 Tooling Around
Workshop Cabinets

In my shop, there never seemed to be enough horizontal surfaces on which to put things, whether to work on them or simply examine them. I had two benches, tables really, that held my lathes and mill. I had my “heavy bench” that really needed to be kept clear and ready for use, but no other space that could serve as a work surface. Additionally, I had too many shelves holding items that I would have preferred to keep clean, but which were exposed to too much dust every time I had to do a little woodworking.
Part of the storage problem was addressed by the addition of three overhead cabinets. My son, Ben, came to the rescue by building me a fine set of base cabinets and that resolved the rest of the problem very nicely, indeed.
Cabinets (Skip to "Electrical Receptacles".)
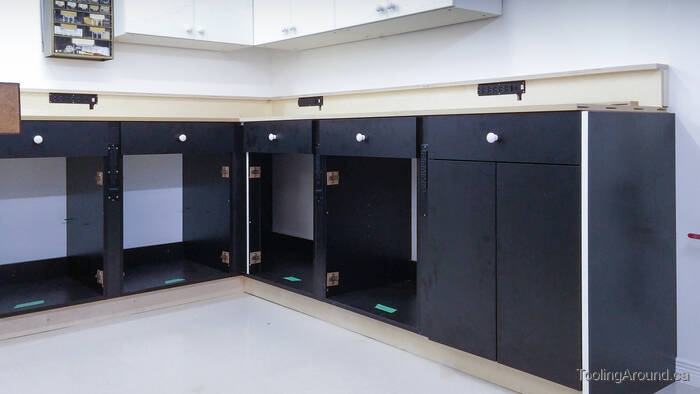
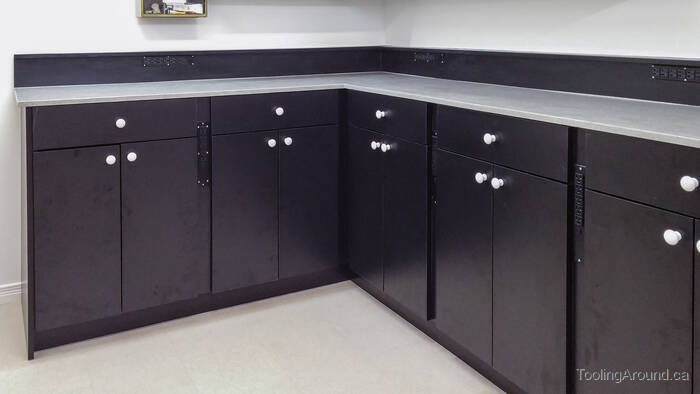
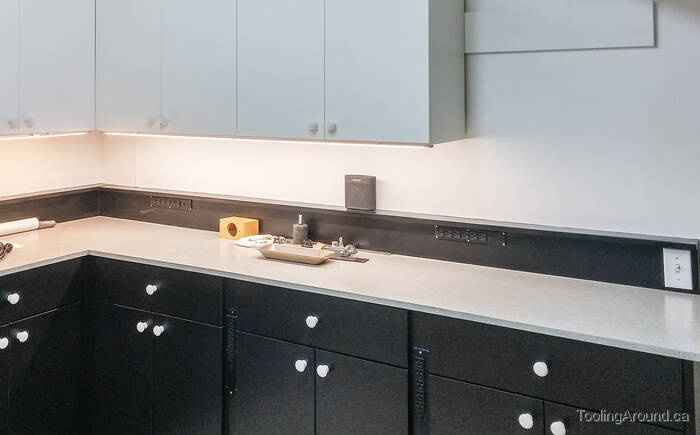
Here are the base cabinets, during installation. The “back splash” on the countertop, is made of 18 mm-thick plywood and houses electrical receptacles, described below. The cabinets, including doors, drawer fronts and gables, are made of 19 mm-thick high-pressure laminate with particle core. The countertop is made of 19 mm-thick MDF. The plywood “kicks” are straight, but the floor′s a bit wavy, as shown by the gaps at the bottom. Later, I planed these edges to match the floor, so tiny things can′t escape under there when I accidentally drop them.
At the end of the countertop, you can see a row of four slots, for biscuit-joining the final piece of the top.
The cabinet is actually a set of five, separate cabinets, joined together. Each has a drawer, a pair of doors and an adjustable shelf. One of them is longer, allowing use of the space in the corner. Three shallow boxes support them on the floor, with plywood kicks covering the gap, serving as a finishing touch and also preventing small items from disappearing under the cabinets.
From the end of the countertop to the front of the back splash, the long side measures 254 cm and the short side measures 188 cm. The width of the countertop, to the wall, is 59 cm. The back splash is 15 cm high, to the top of the narrow shelf, which is 85 mm wide. From the floor to the countertop measures 96 cm. (By way of comparison, the measurement for our kitchen countertop is 91 cm.
Prior to painting the countertop with primer, I filled the two joints. As you can see, they were almost perfectly flush and I probably needn′t have bothered.
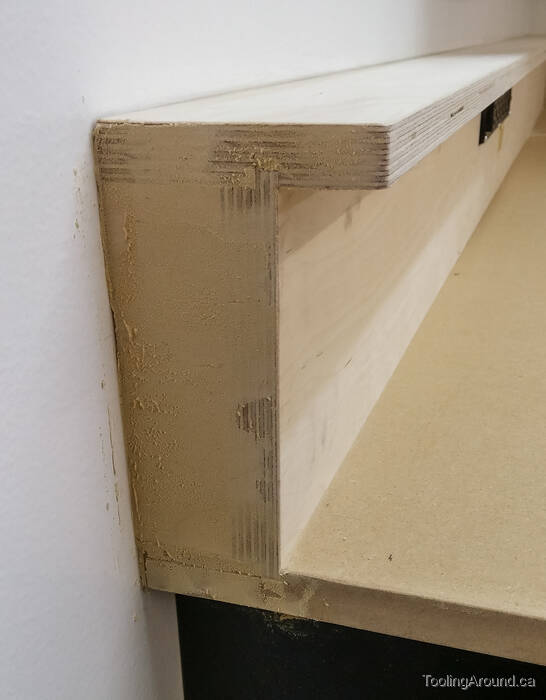
I used wood filler to smooth the ends of the back splash. After sanding, no joints were visible, at all. I included this photo so you can see how the back splash was joined to the countertop and shelf, using dados cut the length of the backsplash.
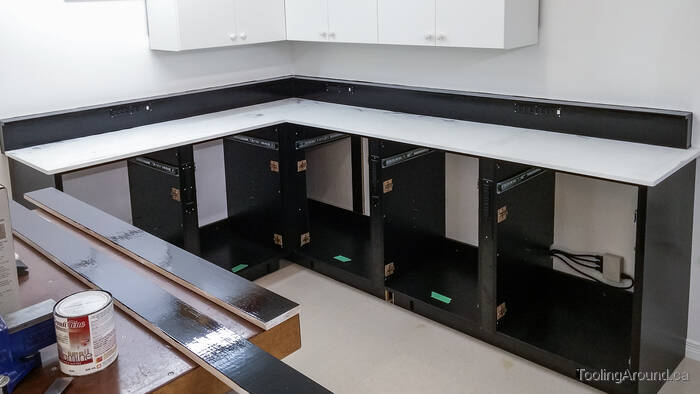
This is how the cabinets looked while painting was under way. The countertop has been primed and the back splash and kicks have been painted. The black paint that I used is a melamine paint, which I have found to be very durable.
If you look very closely, you′ll be able to see short, vertical patches of hook-and-loop tape next to the floor. Matching strips are on the back side of the kicks, allowing them to be attached next to the floor and easily removed, if there′s ever a need to do so. This also means that no fasteners are visible.
After wondering how to finish the countertop, I had the good fortune to find a “counter top refinishing kit” on sale at a nearby Home Hardware store. Available in several colours, I chose grey, in keeping with the colour-neutral scheme in my shop.
This may seem a bit fancy for a workshop, but Ben did such a nice job on the cabinets that I really wanted to have a top that would show them to advantage. Finding the kit on sale made the decision easy. As an added bonus, the cabinets only required about half of the kit, so enough remained to refinish the lathe and mill benchtops.
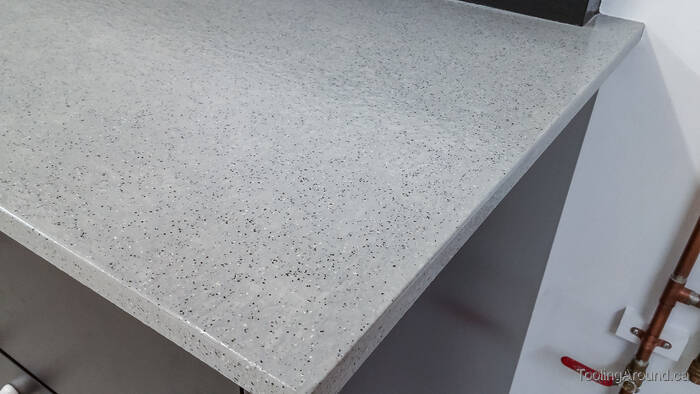
After painting the bare countertop with primer, I applied the refinishing kit. First, a colour coat was painted on. Next came a coat of very gritty paint. The grittiness was caused by a considerable amount of coarse sand. After this coat hardened, I sanded it with a coarse sandpaper, until it was as smooth as I desired. This had the effect of exposing the colours of the coarse sand, which you can see in this photo as tiny black and white dots, and also providing a pleasant textured surface. Finally, I applied a couple of coats of clear coat to protect the top and give it a durable shine. All of the instructions were included in a kit, which also included sandpaper, a small paint roller and tray and even a DVD showing how to do the work.
The surface has proven to be as durable as I hoped and is easy to keep clean. It′s not suitable for severe “workshop abuse”, but has been entirely satisfactory on a cabinet that is designed for lighter use.
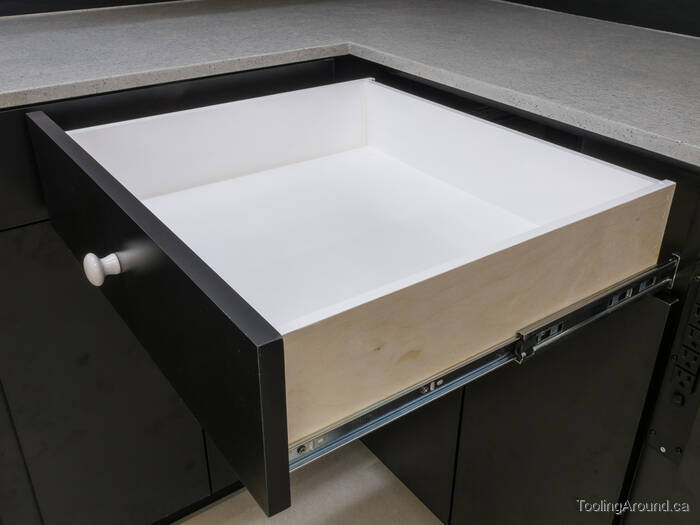
The drawers are mounted on full-suspension slides, ideal for accessing items toward the back. The inside surfaces were treated to some white paint.
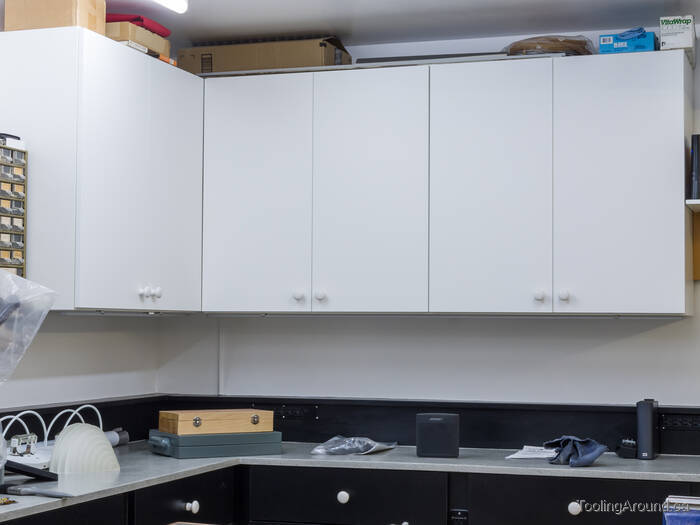
The upper cabinets are from Ikea and are hung on cleats as described on the page about french cleats.
If you happen to notice that the doors are just a tiny bit short for the cabinets, good for you! After using the cabinets for a few years without doors, I decided to add them, but Ikea is constantly changing their product line and I ended up buying some doors that I considered close enough to the correct size.
Prior to adding these doors and the base cabinets, we had replaced the door and drawer pulls on our kitchen cabinets. The old ones were white porcelain and now look very nice in my shop.

In my shop, the upper cabinets do not contain items normally found in a kitchen.
Electrical Receptacles (Skip to "Sliding Tray".)
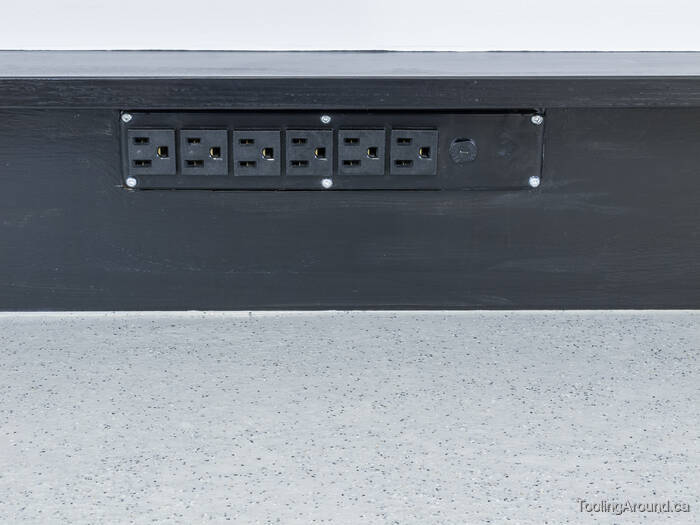
I made sure that I always had electrical outlets within easy reach of anything that might end up on a countertop. Ben was able to supply three of these receptacle strips and provided for mounting them on the backsplash, right up against the narrow shelf.
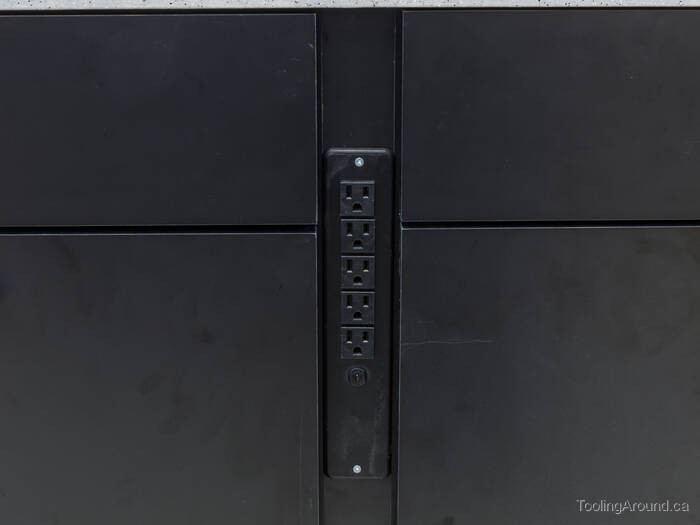
Similarly, Ben provided narrow strips of material between adjacent base cabinet components, with more receptacle strips between them.
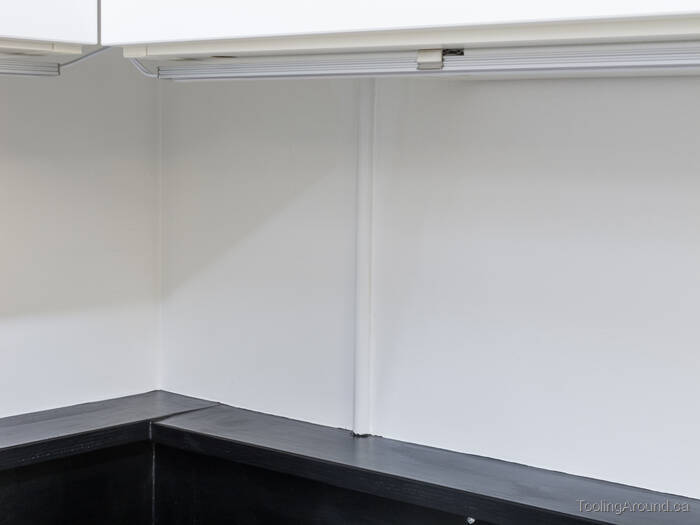
Since there′s a gap between cabinets and also behind the backsplash on top of the counter, it was a simple matter to run the cords from the receptacle strips through these spaces and plug them in to existing outlets in the wall.
Sliding Tray (Skip to "Under-Cabinet Lights".)
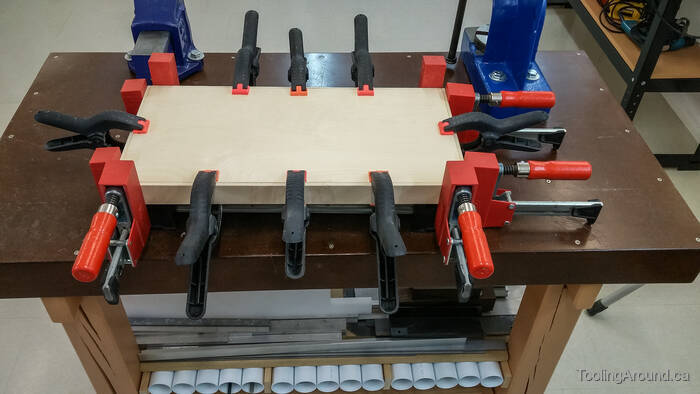
Given enough clamps, we can hold most things together.
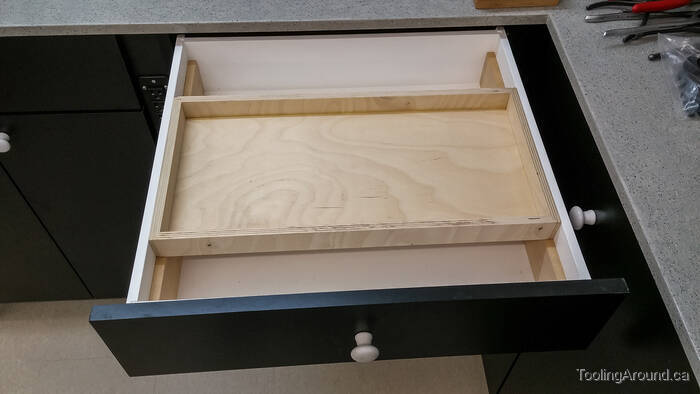
The top edges of the hardwood runners are nice and smooth and waxed with paste wax, so the tray slides very easily.
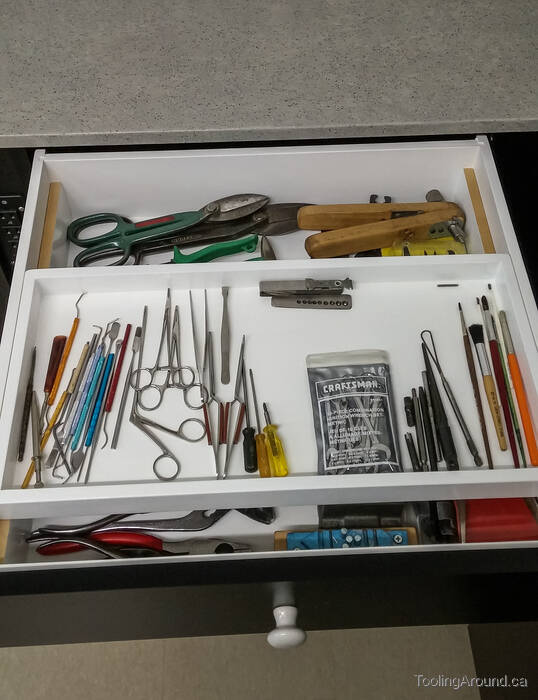
A little white paint and small items have a safe place to live.
Under-Cabinet Lights
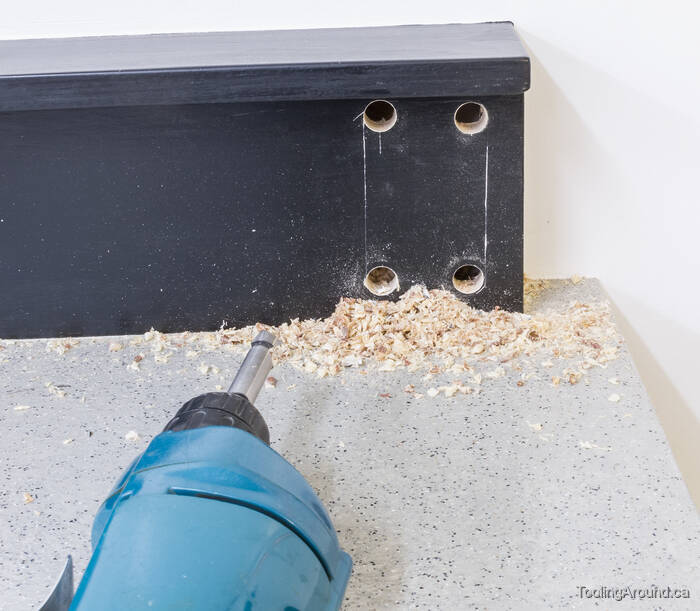
It really is too bad that I didn′t think about under-cabinet lights before the backsplash was installed.
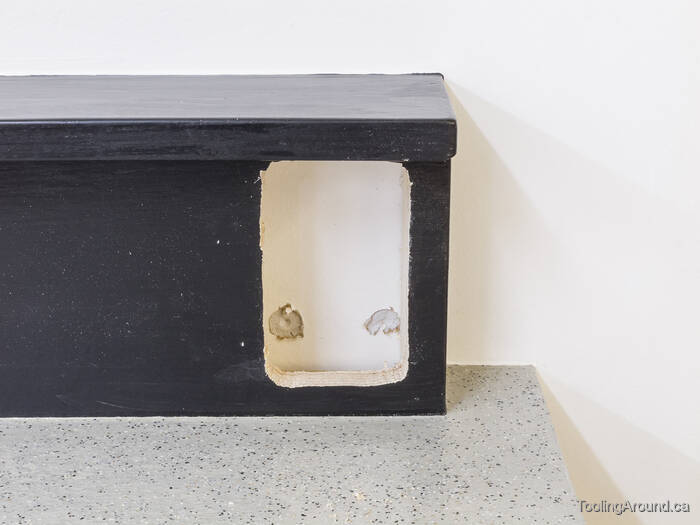
After a bit of drilling and cutting (more effort than I care to admit), I had a place for a metal electrical box.
A cord with a plug on the end drops from the switch down under the bench, where it′s plugged in to the receptacle in the wall. From the switch, I fished a cord through the backsplash almost to the corner of the room, then up to the power supply for the LED lights.
The cord is inside the protective, plastic cover.
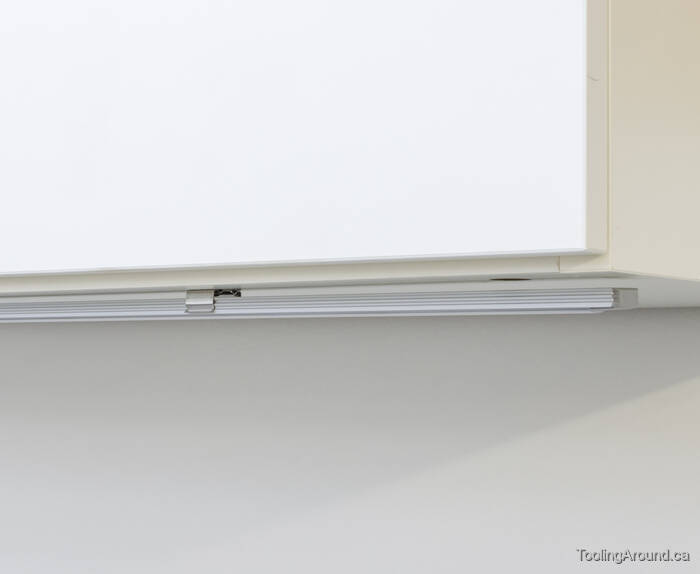
The LED lights are inside the aluminum channel, which is held to the cabinets by metal clips. A diffuser along the bottom spreads the light nicely.
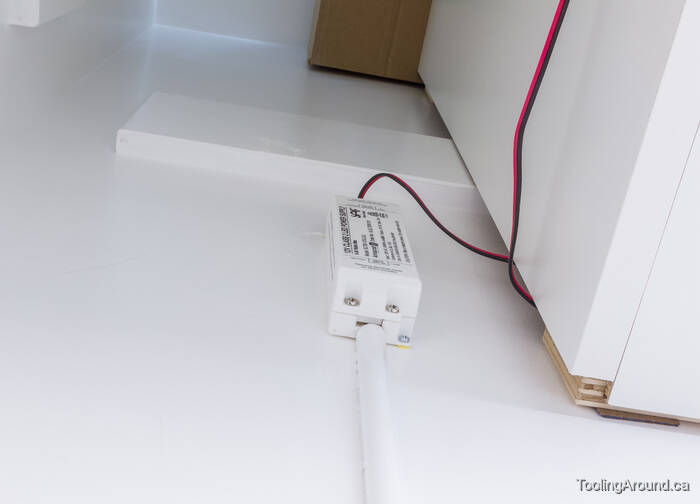
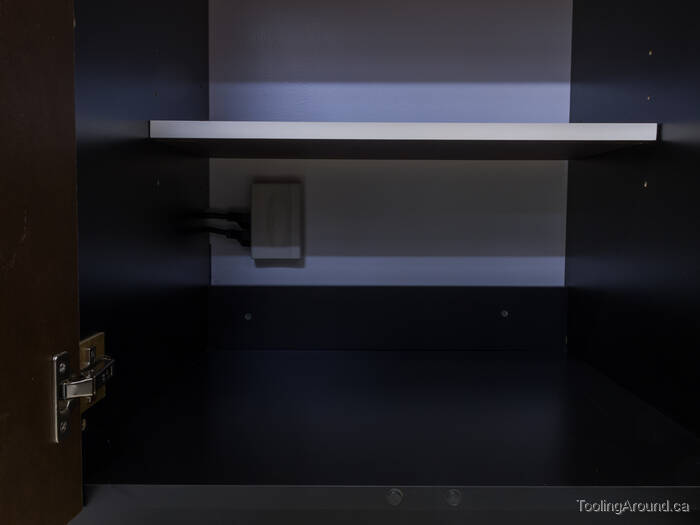
Here′s the power supply, in the empty space in the corner, next to the hanging cabinets.