 Tooling Around
Taig Lathe – Boring Tool Holder
This is the boring tool holder, just after completion. It never looked this good, again.
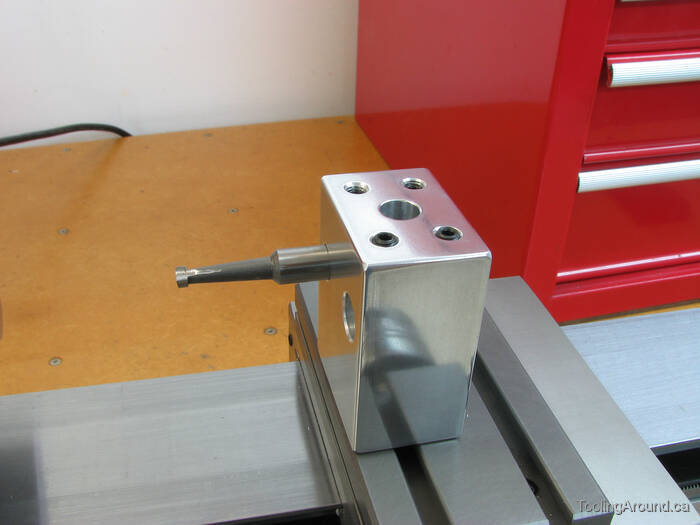
The holder has two holes, to accommodate two different boring tool diameters: 5/16″ and 3/8″. In use, after inserting a boring tool, the tool is rotated until the tip of the cutting edge is at centre height, and then the grub screws are tightened to hold it there.
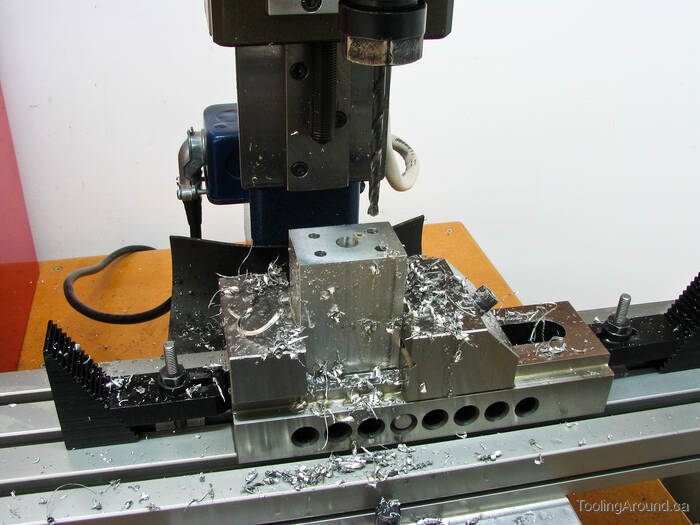
Here, I'm drilling grub screw holes.
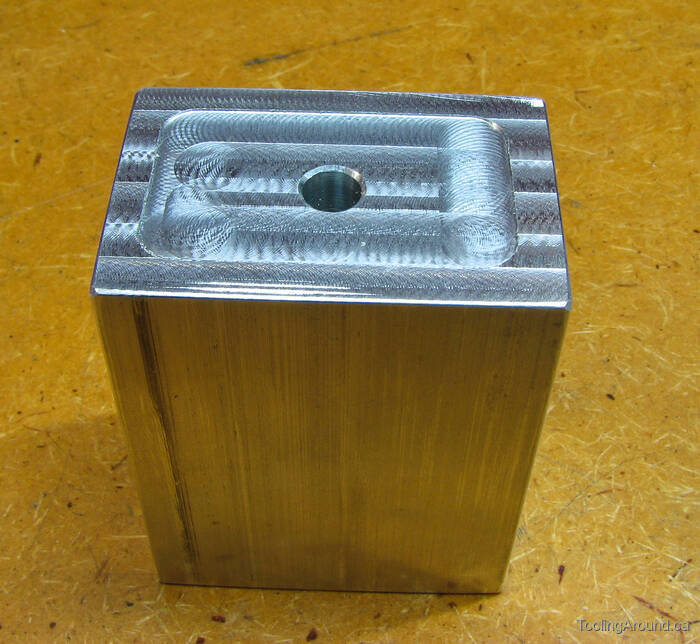
This is the bottom of the tool holder, showing relief to ensure that the clamping force will be applied around the outer edges.
If you look at the underside of a Taig lathe tool holder, you'll see the same sort of relief.
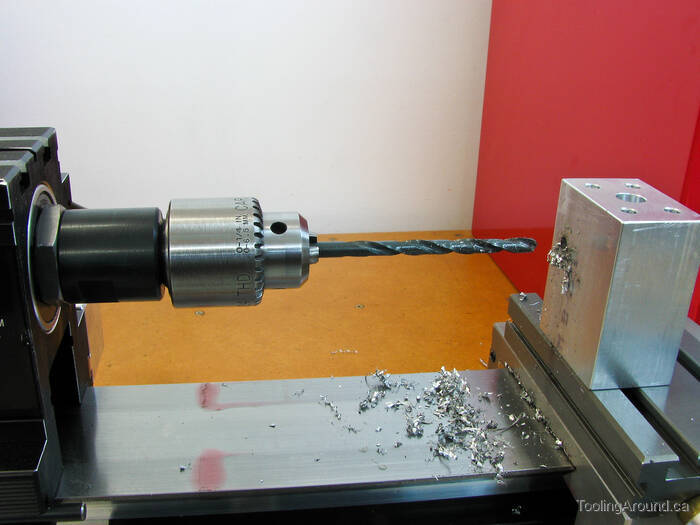
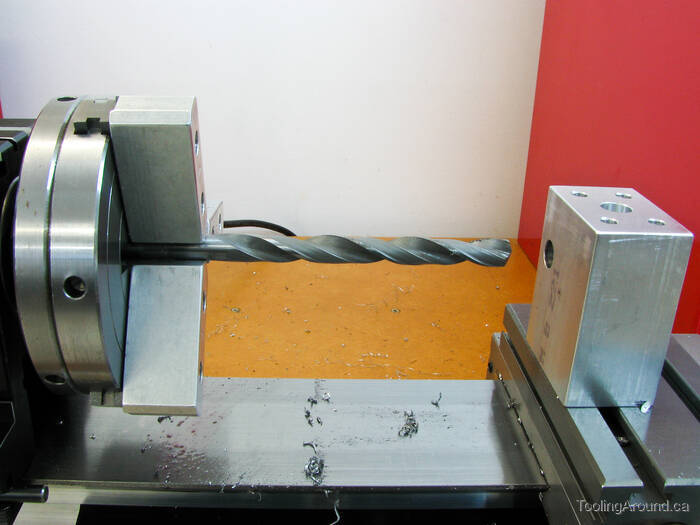
Here, I'm drilling a hole, enlarging a smaller hole.
Drilling in the lathe is, of course, the simplest way to ensure that the hole is at centre height.
Here, I'm drilling a hole, then enlarging the hole some more, working up to the desired size. The drill chuck won't handle these larger drill bits, so I switched to a three-jaw chuck.
If you try this, take care that the drilling forces don't drive the bit back into the headstock taper, marring it.
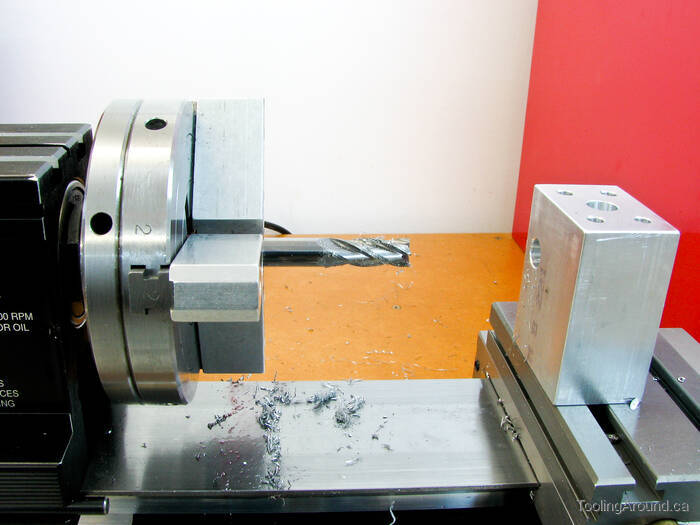
After drilling a hole close to the desired size, I substituted a milling bit to enlarge the hole to the final size. It's my experience that an end mill produces a hole to a desired size very accurately.

This is how I “make it pretty”. Generally, I start with an 800-grit paper and work down through finer grades until I have the finish I desire. Then I may or may not use a bit of metal polish.
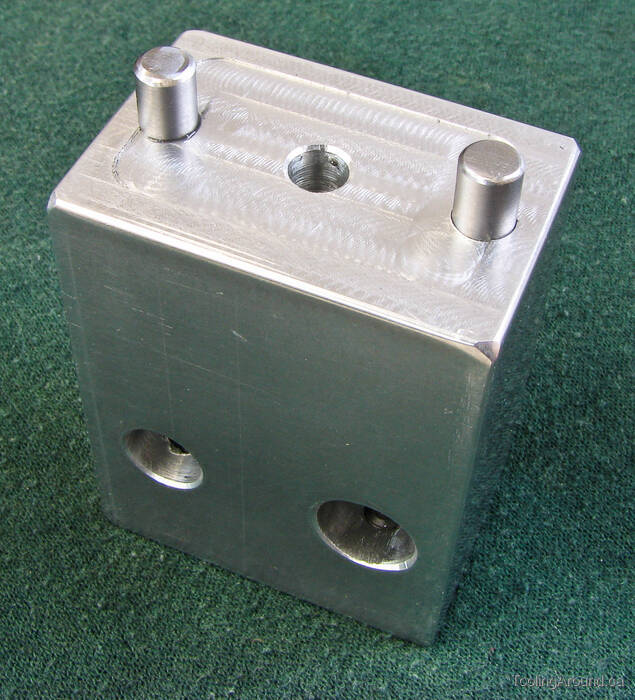
Two dowels in the base keep the tool holder aligned with a T-slot. I added these after using the tool holder and finding that it wanted to twist arond the mounting screw.

Here it is in use, using one of those inexpensive carbide cutters, mounted in the larger of the two holes.