 Tooling Around
French Cleat
During a visit to my shop, I showed my use of a french cleat to some friends. Although they had visited previously, they hadn't noticed it. As we talked, it became clear that, although it's a very old idea, it's still interesting. So, here it is. Perhaps there are some ideas that you can adapt for your own use.
When I built my shop, I really had no idea how to arrange its contents. In my experience, I need to use a shop to figure out what I like or don't like about it. It's relatively easy to rearrange items that are sitting on the floor, but wall-mounted shelves and cabinets are a different matter. So, I decided to install a cleat that runs all the way around the shop.
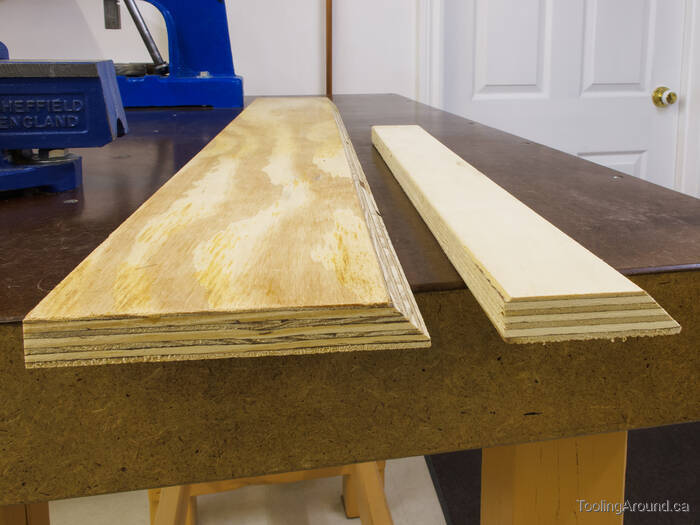
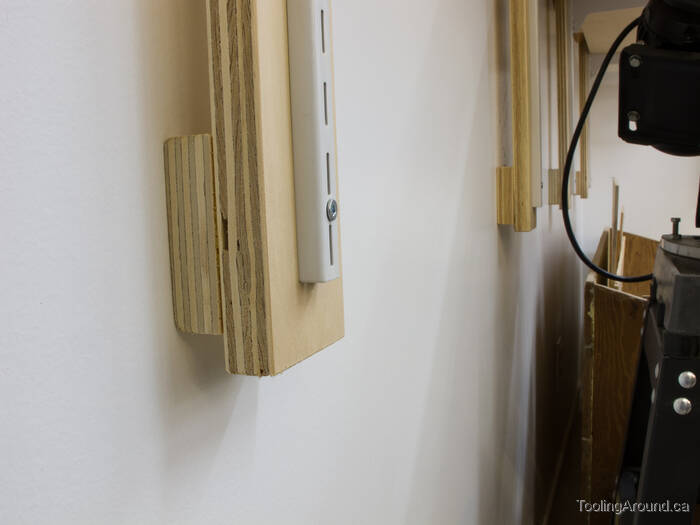
These are the two parts of a french cleat. The wide piece will be fixed horizontally to a wall and a length of the narrow piece will be attached to the back of whatever you want to hang on the wall. The article is hung by positioning it so the bevelled edges interlock.
The cleats are made of 19 mm plywood, cut at 45°. The wall-mounted cleat is something under 14 cm wide, each length being butted against the next, end to end. Wherever a cleat passed over a stud, I attached it to the framing using two suitable screws, one above the other, for a very strong attachment. As I finished the drywall, I filled the joints and screw holes with drywall compound. Then I painted the entire room with semi-gloss white paint, on the theory that it would reflect lots of light and be easy to clean.

Here's a hose rack, hanging on the cleat. You can see how the bevelled edges interlock.
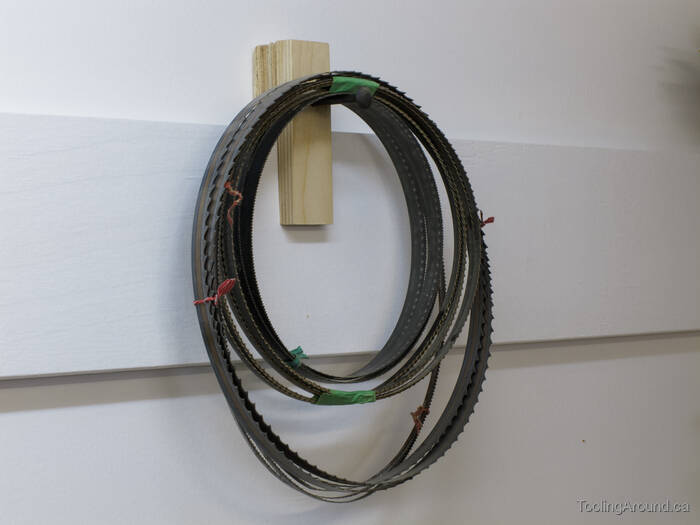
An easy way to store some wood. Well, some metal, too, although it's not the best way to store it.
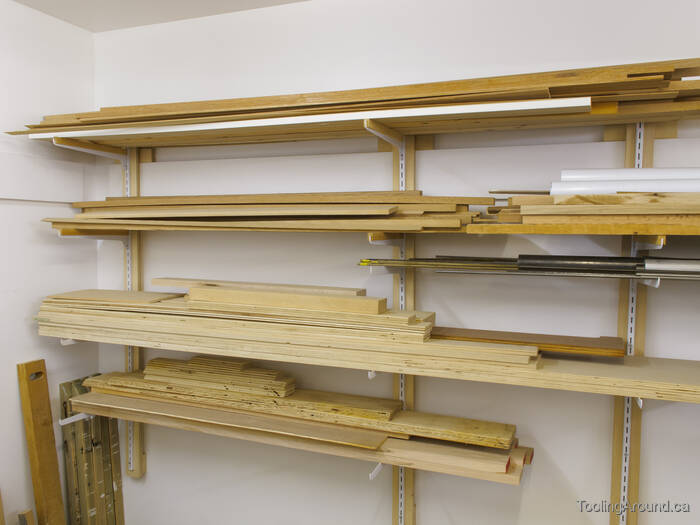
The lumber rack uses adjustable shelf brackets, without the shelves. I just mounted the support rails to 6 cm-wide strips of 19 mm plywood, with a cleat at the top of each. The cleats are 16 or 17 cm long, but the length isn't critical.
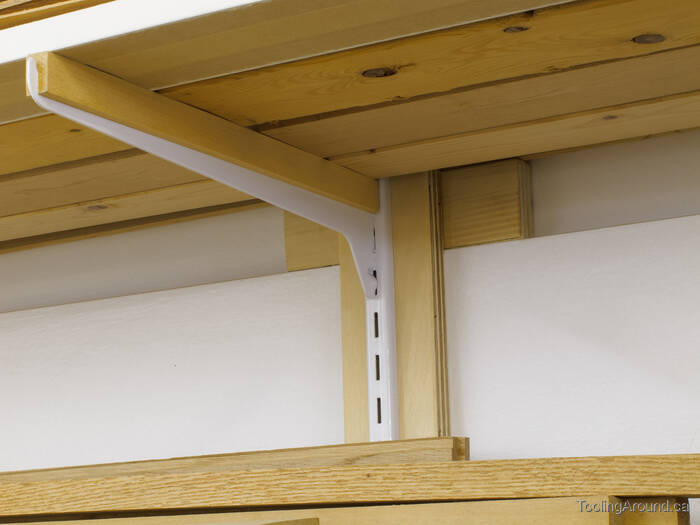
The vertical strip of plywood is “screwed and glued” to the short length of cleat. Because the wide cleat is fastened very securely to the studs behind the drywall, it's able to bear quite a lot of weight.
The bottom of the rack will tend to pivot toward the wall, so I attached short lengths of 19 mm plywood spacer at the bottom, to keep it parallel to the wall.
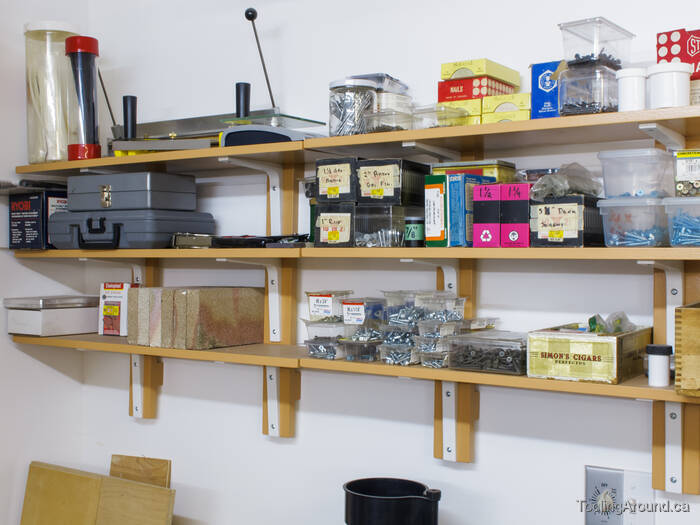
Here are some conventional shelves, with the brackets attached to strips of plywood.
These are inexpensive kitchen cabinets, from Ikea. The cleats run the full width of each cabinet and the Ikea-supplied mounting hardware is attached to the cleat.
Things would be cleaner in there, if I invested in cabinet doors.
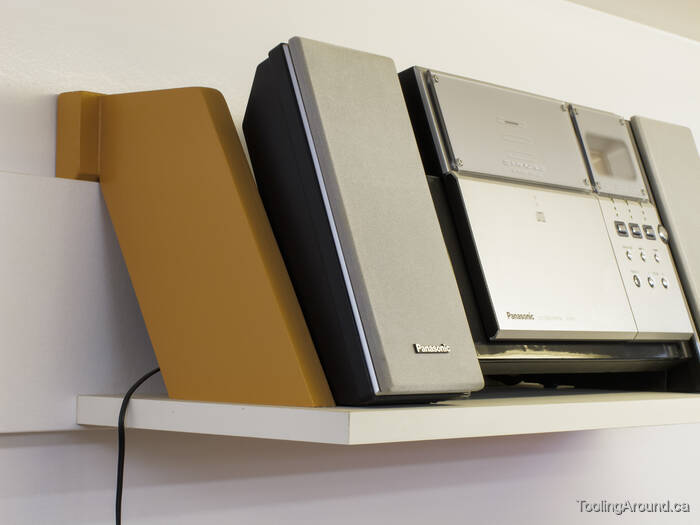
Here's another variation on a small shelf. My MP3 player sits beside this amplifier and speakers, so I can keep up with podcasts.
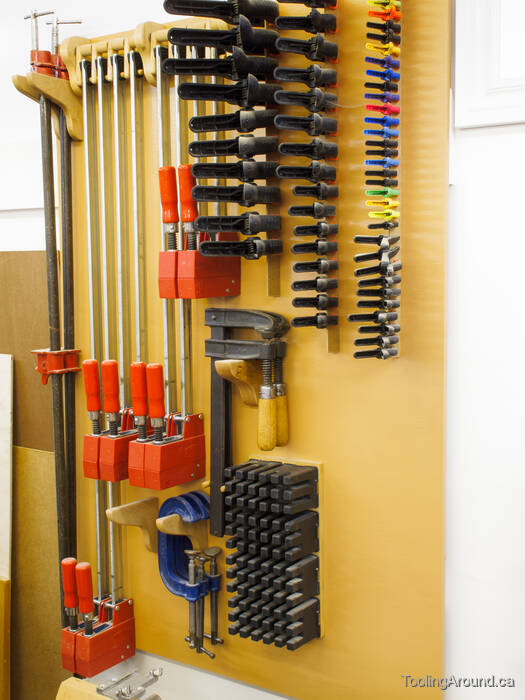
Until I came to appreciate the effects of dust on my breathing, I was going to do woodworking. Now I'm working with metal, but I still have my clamps.

Here's a simple way to collect my hand saws.
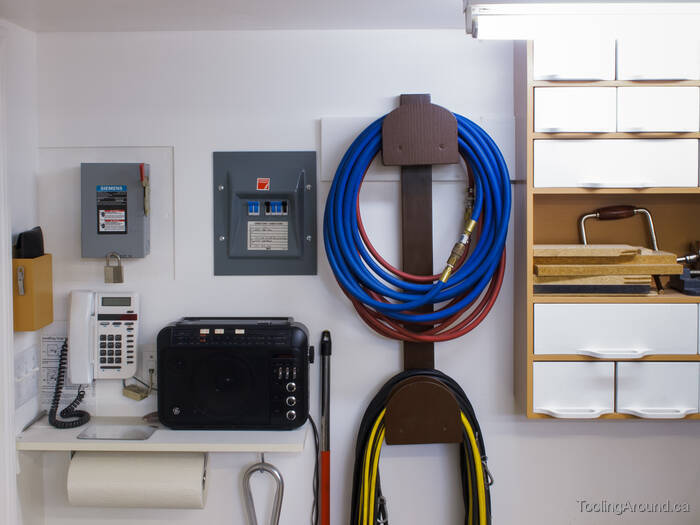
The air hoses and extension cords are beside the door.
The little wooden box at the far left holds my prescription safety glasses. (Yes, they're bifocals.) The tiny thing hanging on the side of the box is a pair of “Sliver Gripper” tweezers. Another pairs hangs out on my key ring.
Not everything requires a large investment in time and material. Here are a couple of simple hangers, shown in use in the next photo.
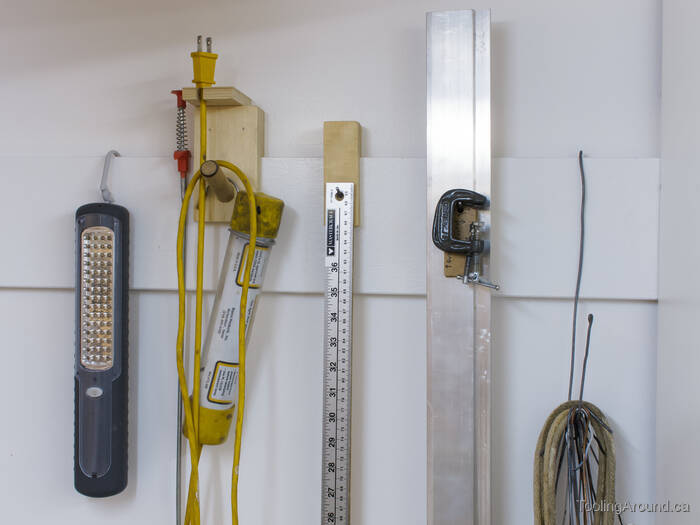
Sometimes I make simple hangers for little things. Other times, I just hang them directly on the cleat.