 Tooling Around
Heavy Bench
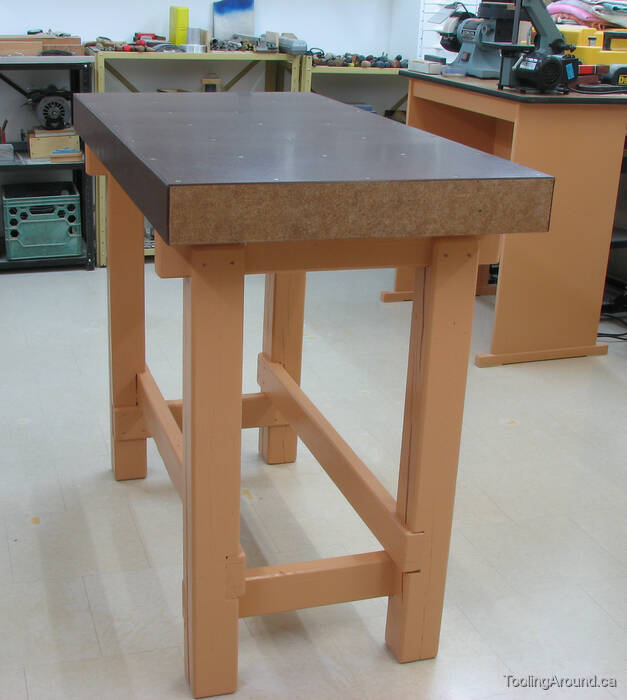
This bench is heavy in the sense that it's intended for heavy use. Put something in the vise and give it good whack with a hammer, if you like. Clamp a piece of wood to the bench top and have at it with a mallet and chisel. Turns out it's also heavy in the sense of being a challenge to pick up.
The top surface is covered with a piece of 1/8″ tempered hardboard. The hardboard is just a replaceable wear surface. It's attached by several short screws, so it's easy to remove, and is coated with a few coats of varathane to toughen and waterproof it. Someday, perhaps I'll replace the wear surface with a sheet of steel.
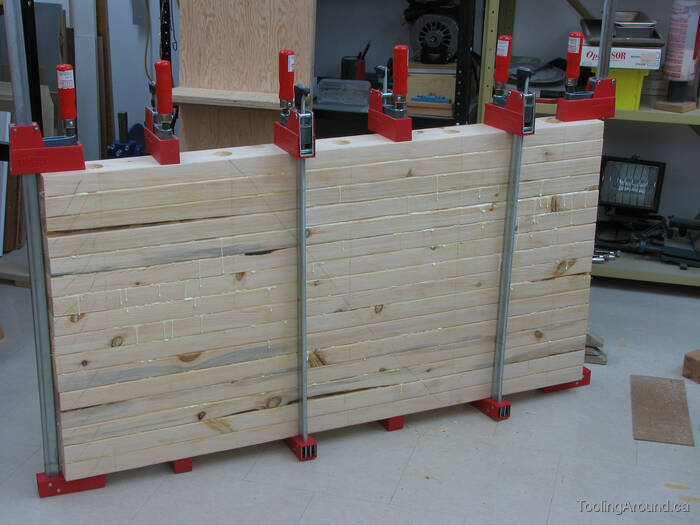
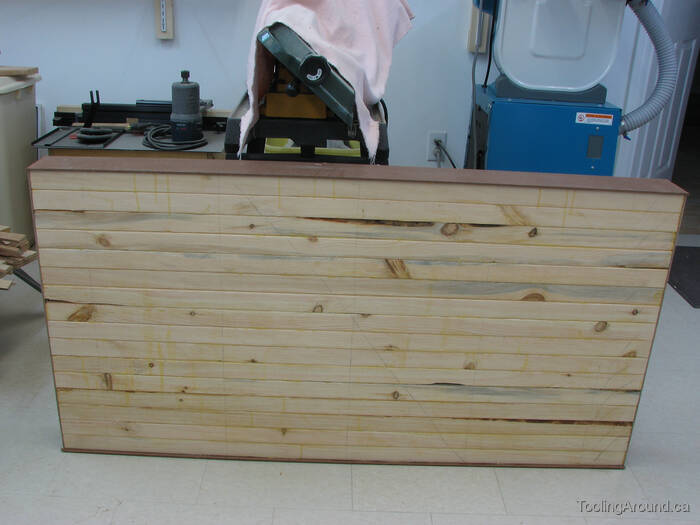
The bench top is made of a set of sixteen 2×4's, glued together side by side. The top is four feet long, mostly because that's a convenient length, but also because it meant that I could use eight-foot SPF studs, which are inexpensive. Before gluing the pieces together, I drilled holes for five threaded rods and assembled the top dry, to make sure it would go together. The holes in the outer 2×4's were counter-bored to accept nuts and washers.
To assemble the top, I inserted the rods in one of the outer 2×4's, complete with nuts and washers. I placed the 2×4 on the shop floor with the rods sticking straight up. After coating the inner side of this first piece with carpenter's glue, I slid the next 2×4 down over the rods, onto the first piece. Then I repeated the process until all sixteen pieces were glued together. This had to be done fairly quickly and without interruption, so the glue wouldn't have time to set up before I was finished.
The photo shows how the bar clamps applied enough pressure to squeeze out a bit of glue. I put four clamps alternately on each side of the top to help avoid any bowing of the top. Of course, the threaded rod helped, too.
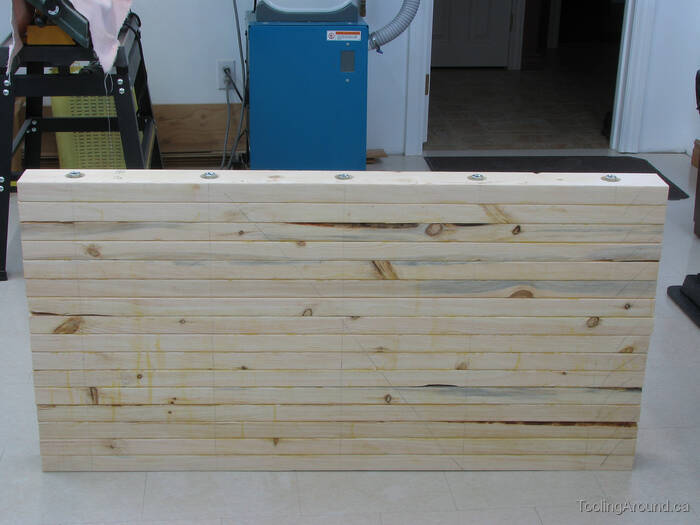
Here's the assembled top.
The edges are covered with 1/8″ tempered hardboard, just for appearance.
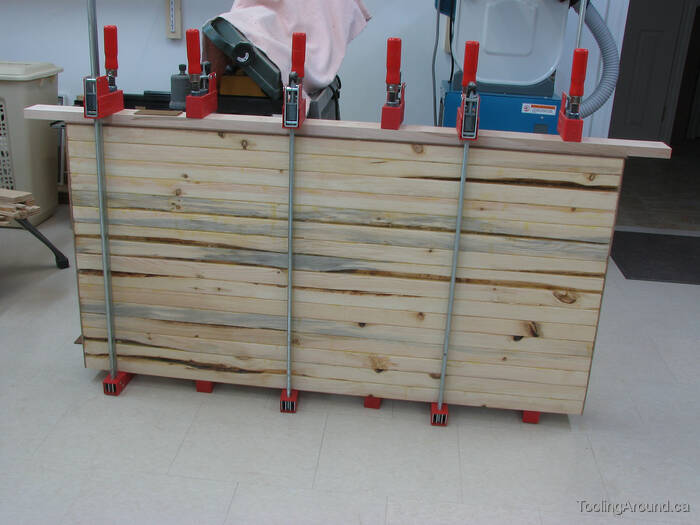
The hardboard is glued on. I used a length of board to spread the clamping force and used several clamps to help get an even pressure along the entire side, as the glue set up.
The edges are covered. If you look closely, you'll see that the hardboard was cut a bit wider than the sides of the top. This was to allow for any accidental misalignment during gluing and was trimmed flush, later.
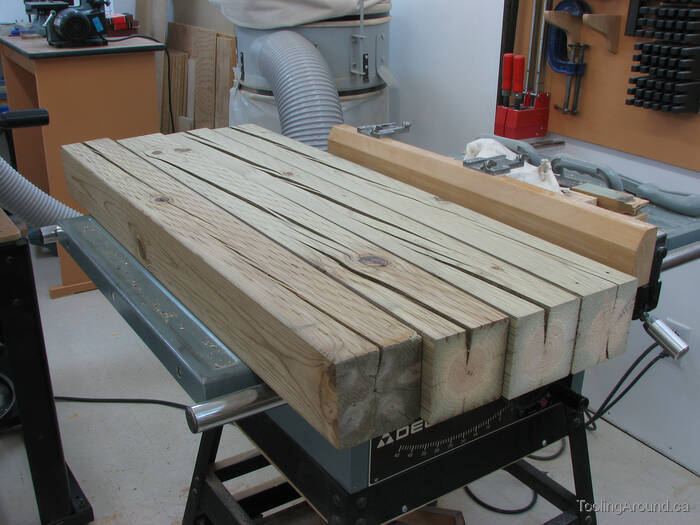
The upper surface of the benchtop needs to be flat, of course. But it wasn't, because the 2×4's weren't perfect and neither was my workmanship. That was as expected and the next step was to flatten the top.
My trusty table saw served as a work surface. After lifting one end of the top up so it could be leaned against the edge of the saw table, I lifted the other end and slid the top onto the saw. Did I mention that it's heavy? Working alone, it was all I could do to get it up there.
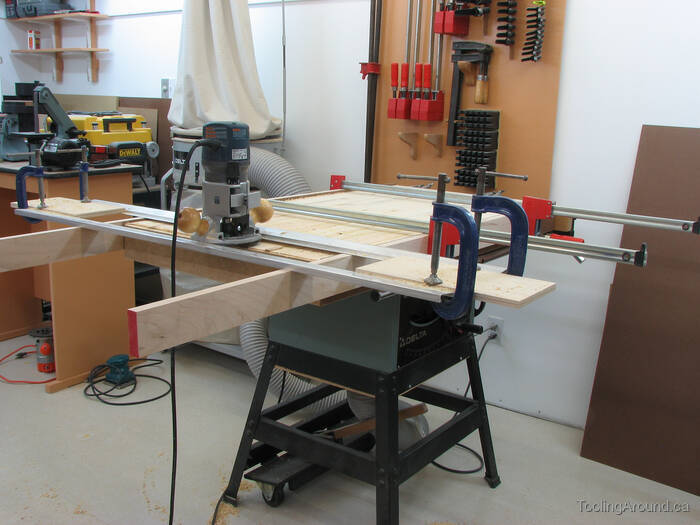
There was one step remaining before I could flatten the top. The 2×4 studs had some rough edges, so there were voids in the top. I chiselled the irregular voids into more or less rectangular voids with constant depths. This made it easier to cut filler pieces, which I glued in place. When that was done, I set up the arrangement shown here.
Two straight pieces of maple hardwood are clamped to the sides of the bench top, extending well off one end of the top. They would have extended a similar distance off the other end, too, but they weren't long enough, so I just re-clamped them further along the top, later. The purpose of these boards is to provide a straight, true reference surface, somewhat higher than the decorative hardboard covering the sides of the bench top.
Next, I assembled rails to support my router. The rails are not made for this purpose. They're acually the two parts of one of those straight edges that are used to guide a circular saw or other cutting tool when making a straight cut on a long panel, for example. When used as intended, the two pieces are joined to make a single straight edge. Anyway, I used C-clamps to temporarily attach the straight edges to two pieces of wood cut to just over the width of the router base.
The result of all this setup is that the router can slide back and forth along the straight edges and the whole assembly can slide along the bench top, from one end to the other. Now you can see why the boards have to project beyond the bench top; this allows the router to reach the very edge of the end of the bench top.
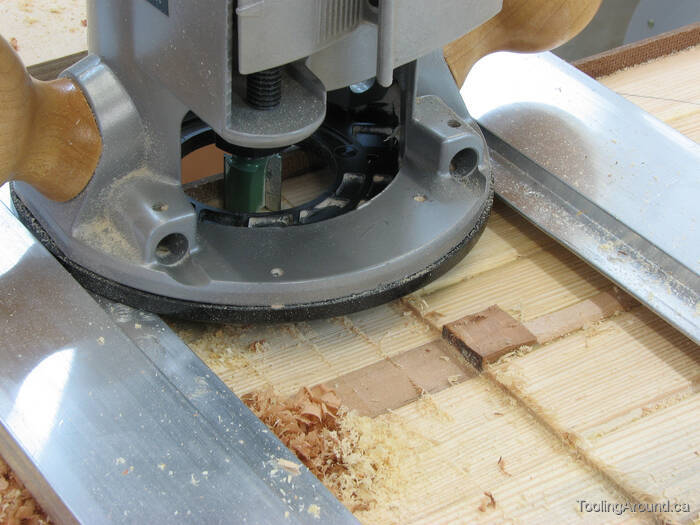
Here you can see how the router was used to flatten the bench top.
I used a 3/4″ router bit and adjusted the depth of cut to get below the rounded edges of the 2×4's. If I remember correctly, I didn't attempt full-width cuts, but I'm not really sure about that.
That dark bit of wood is one of the patches that I used to fill one of the voids in the top.
This rather rough-looking 4×4 material was used for the bench legs, with 2×4 cross pieces to complete the framing. The 4×4's have been run through a thickness planer to clean them up a bit.
This was another case of using up a bit of left-over material. I used to have a sloper antenna for a communications receiver. One end of a 4×4 was stuck in the ground and the low end of the antenna was attached to the top of the 4×4. It was out in the weather for years, until I sold the receiver and reclaimed the 4×4. Now it's inside, out of the weather.
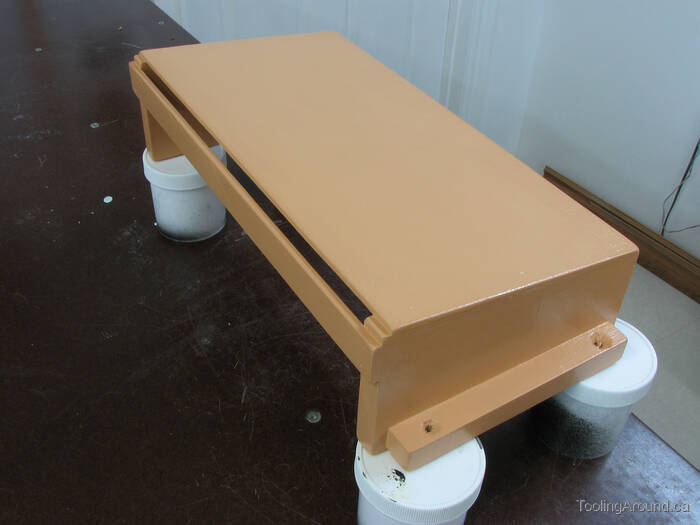
To keep a few small items close to the vise, where they will be used, I made this small shelf. It's sitting on some plastic containers while the paint dries.
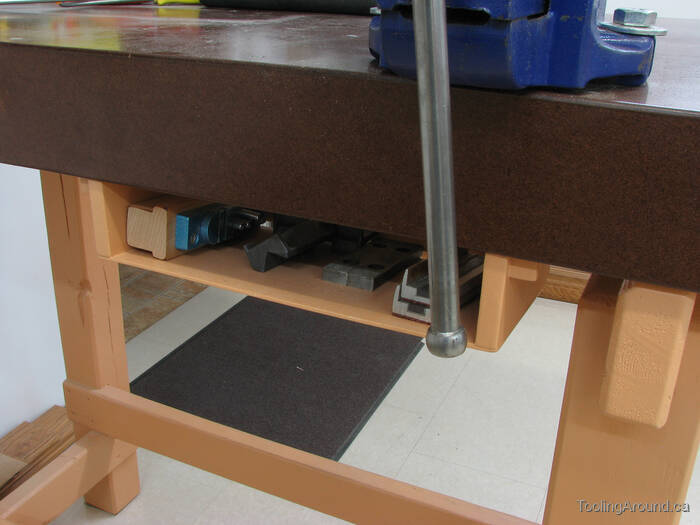
Here's the installed shelf.