 Tooling Around
Dashboard Camera Bracket
Have you seen a dashboard camera (a.k.a. dash cam)? They're intended to be installed on a car's dash, where they record the view in front of the car. I had read about them and seen some sample recordings “on the Internet” and been sufficiently intrigued to consider getting one, just for fun. However, I wasn't prepared to buy one without some assurance that it would be satisfying and I wasn't intrigued enough to track down reviews and specifications. So, I ignored them.
Then one day, I was catching up on Michael Reichmann's excellent photography web site and came across a fun article about a drive from Michael's home in Toronto (Canada) to San Miguel de Allende (Mexico). He recorded the thirty-nine hours of driving and compressed the video to just one hour. You can read the article here. In his article, Michael described the dash cam that he used, a Genius DVR-FHD590. I decided that I liked the video quality and the fact that Michael had one, so I yielded to temptation when Staples had them on sale.
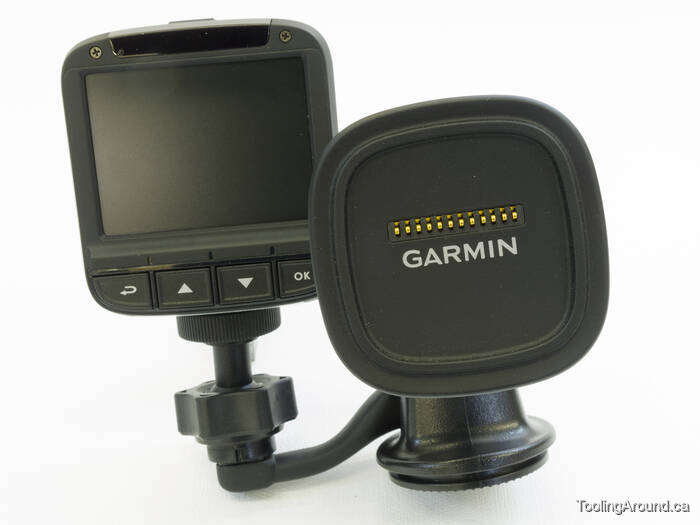
The next challenge was to mount the camera on the dash of our Volkswagen Jetta. We already had a mounting point for our Garmin GPS navigator and I wasn't interested in using either of the brackets that were provided with the camera. Eventually, I decided to make use of the existing GPS navigator bracket.

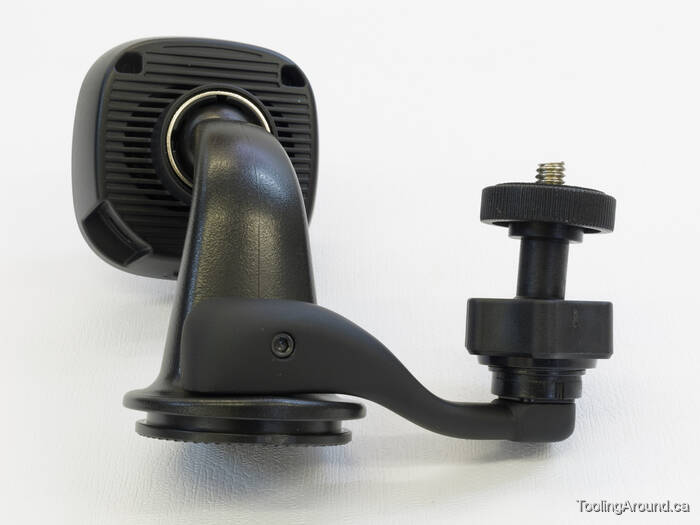
Here's one of the brackets provided with the camera, using a suction cup to attach it to the windshield.
The other provided bracket is presumably for attaching the camera to a sun visor, but maybe not, as it would have to be a very thin visor.
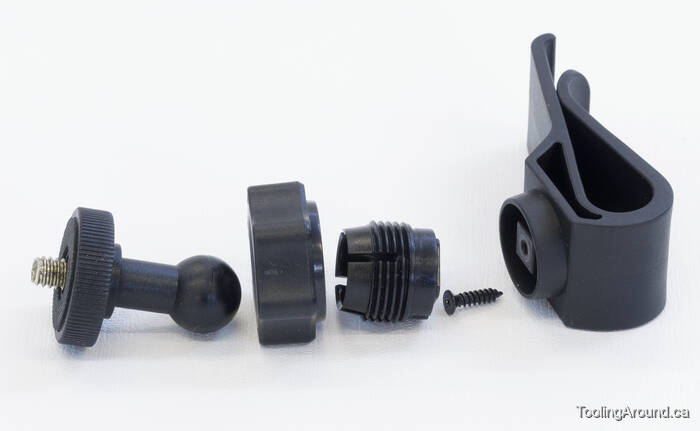
Looking at the parts of the smaller bracket, I saw possibilities for adapting it to a new mounting. The three parts on the left side of the photo comprise a miniature version of something that photographers call a “ball head”, with a base, a ball and a tightening ring. All I had to do was make a bracket for the ball head.
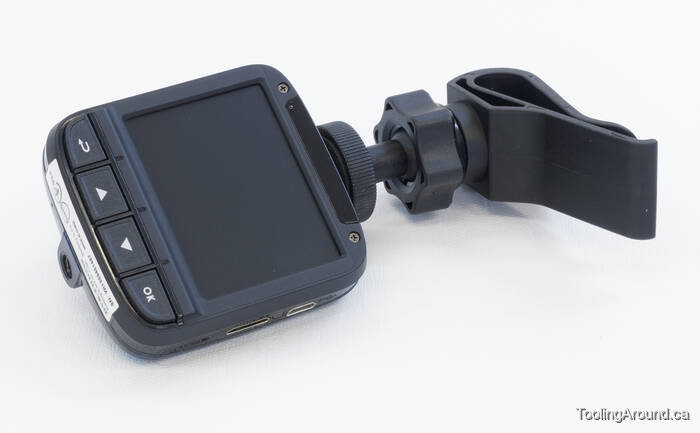
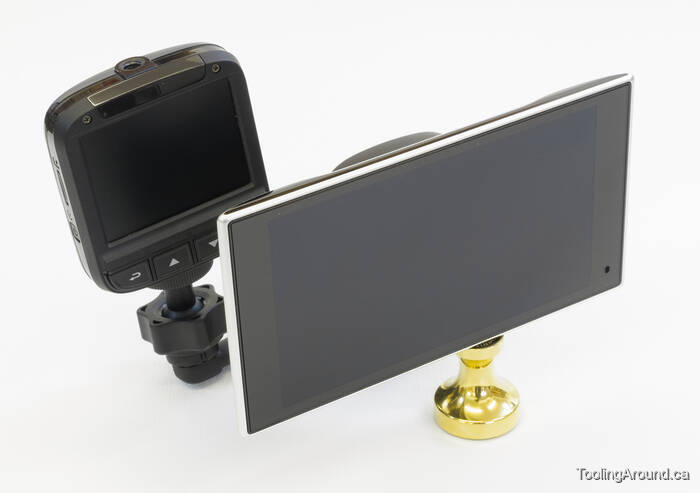
I decided that I wanted to keep the camera low and mostly behind the GPS navigator, in order to minimize any blocking of the view out the window. The camera is not normally touched, once it has been set up. It turns on and off automatically as power is provided (or not) via the car's 12V accessory outlet.
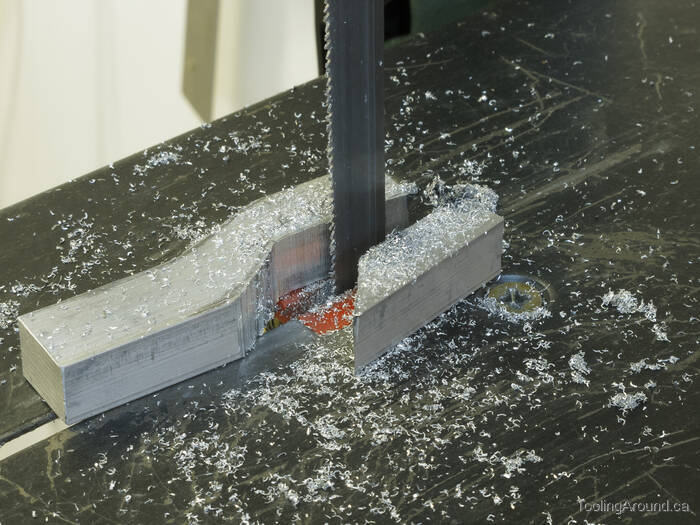
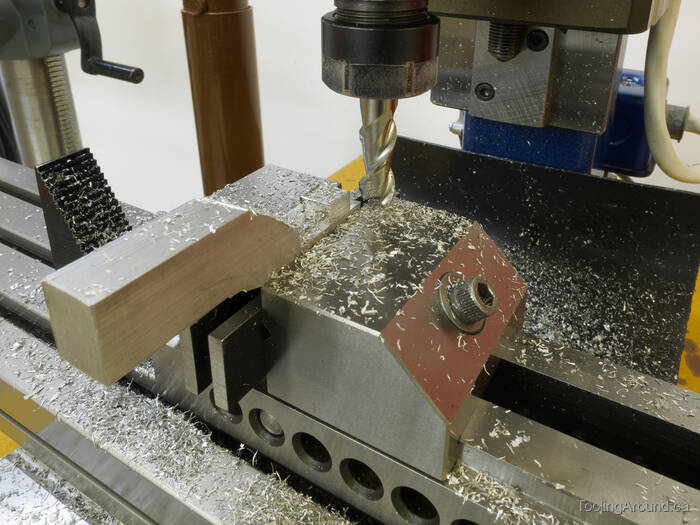
To start, I removed the bulk of the waste from a short length of aluminum bar. If I remember correctly, the bar was 1/2″ × 1-1/4″.
The end to the left in the photo will be shaped to fit the back of the existing GPS bracket. The other end is offset to make it lower and will support the ball head.
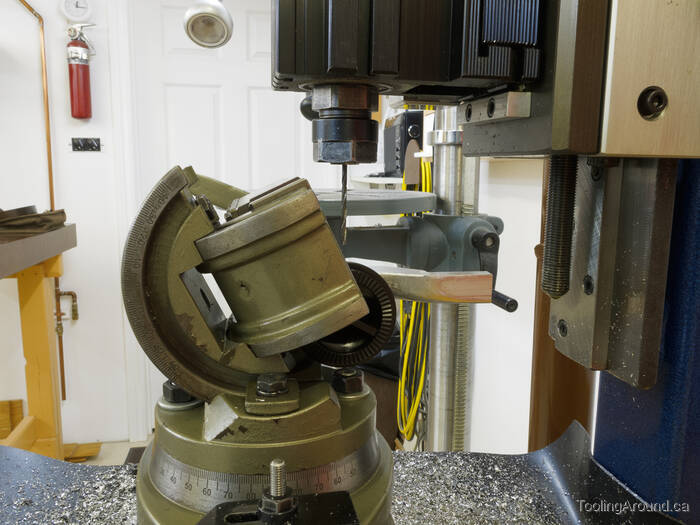
The seat for the base was milled at the lower end of the new bracket.
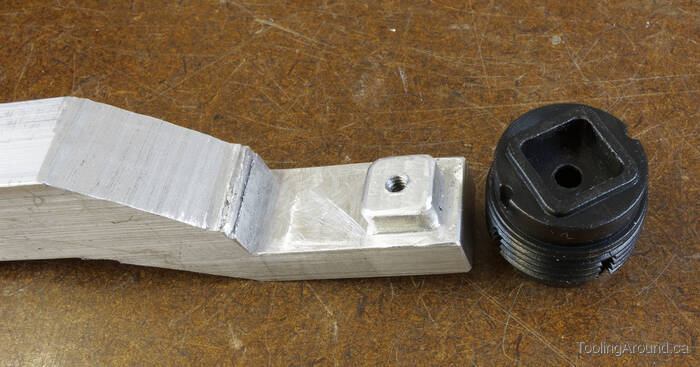
The ball head base and the matching seat, ready for a test fit.
Looks pretty good.
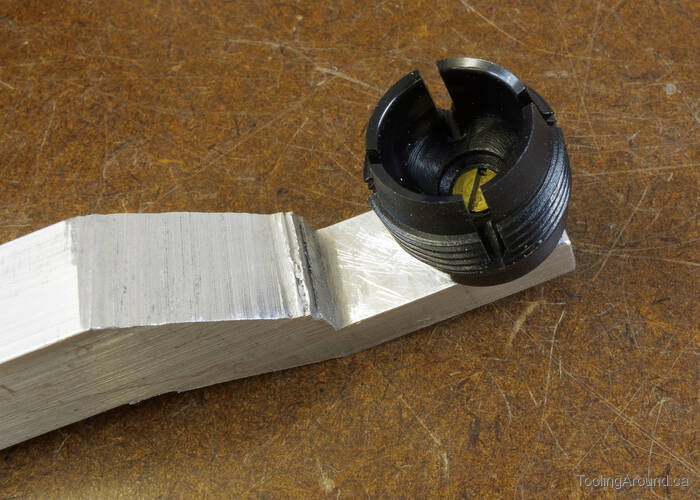
The GPS navigator bracket is tapered, resulting in a surface that is not vertical. Before filing the camera bracket's mating surface to fit against it, a flat surface was milled at a 10° angle. With this as a starting surface, it was fairly easy to file a curved depression to fit the GPS navigator bracket.
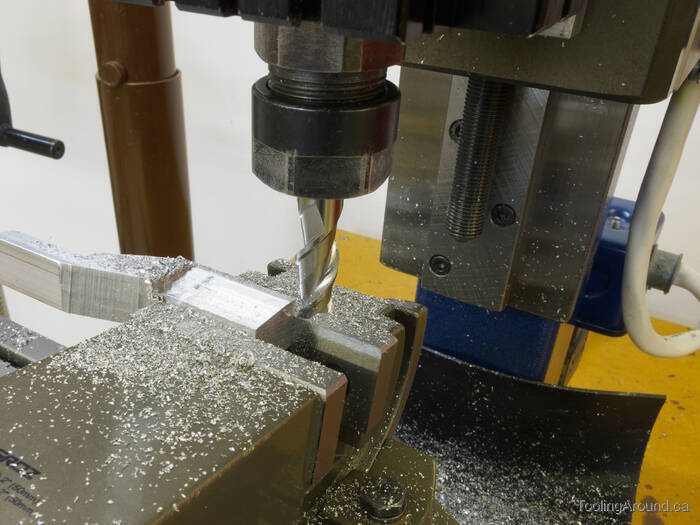
The camera bracket is attached to the GPS navigator bracket using a 4-40 SHCS. After gripping the two brackets in the vise, I tilted it at the appropriate angle to drill a hole through the camera bracket and deep into the GPS navigator bracket. Without disturbing the setup, I drilled a clearance hole in the camera bracket and followed that with a countersink hole. Later, I tapped the hole in the GPS navigator bracket to accept the SHCS.
It's not visible in this photo, but there's a locating pin helping to keep the two brackets in alignment. You can see it in photos of the finished bracket, later on this page.
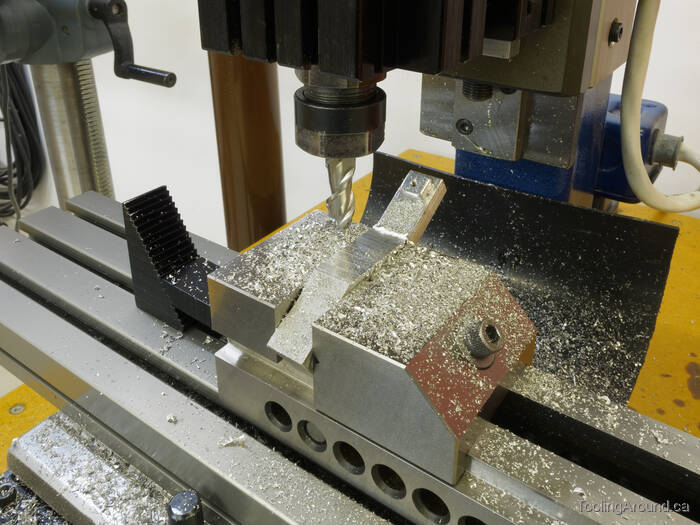
To cut down on filing, I removed larger amounts of material on the mill.
What followed was a fairly long but relaxed filing session. There was little to photograph, but here's a list of the things I kept in mind as I worked.
- One end of the bracket was initially shaped to fit the GPS navigator bracket and the other end was machined to hold the base for the camera's ball head. Most of the bracket still had flat sides that could be gripped in a vise. As I filed the bracket to a pleasing curved shape, I avoided the flat sides so I could hold it in a vise as long as possible to make the work easier. I tried to plan the filing to postpone the time when I could no longer use the vise.
- I used coarser files before using finer files.
- I kept the files clean by using a file cleaner. (Mine is from Lee Valley Tools.) This cannot be over-emphasized. The least bit of aluminum waste embedded between teeth on the file will gall against the work piece, quickly making a small problem bigger.
- I shaped the “non-negotiable” features first. For example, the end of the bracket supporting the ball head was shaped first. Next, the part of the bracket around the mating surface for the GPS bracket was shaped. After that, the rest of the bracket was shaped to form pleasing curves joining these two ends.
- As the curves developed, I kept examining the bracket for all angles, looking for any superfluous mass. Think of it as trimming away anything that detracts from its appearance.
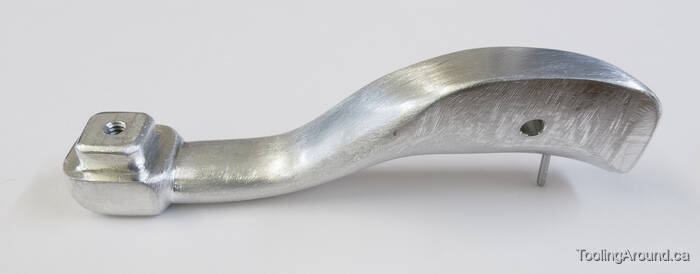
This is how the bracket looked after the filing was almost finished. There's still a bit of fine filing to do to smooth out the rough spots.
When I was happy with the result, I roughened the surface with emery cloth (so the paint could “bite”) and then scrubbed the bracket thoroughly with soap and water. This was followed by a coat of grey primer and a finish coat of flat black paint.
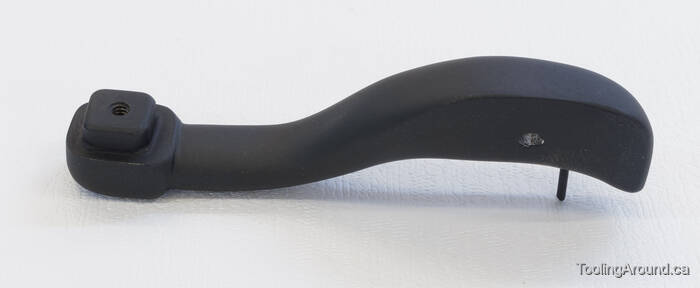
It looks better with some paint. This side mates with the GPS navigator bracket.
The pin sticking out the bottom helps align the two brackets. It's inserted into one of the two holes that were already in the base of the GPS navigator bracket. I don't know the purpose of those holes.

This is the side facing away from the GPS navigator bracket.
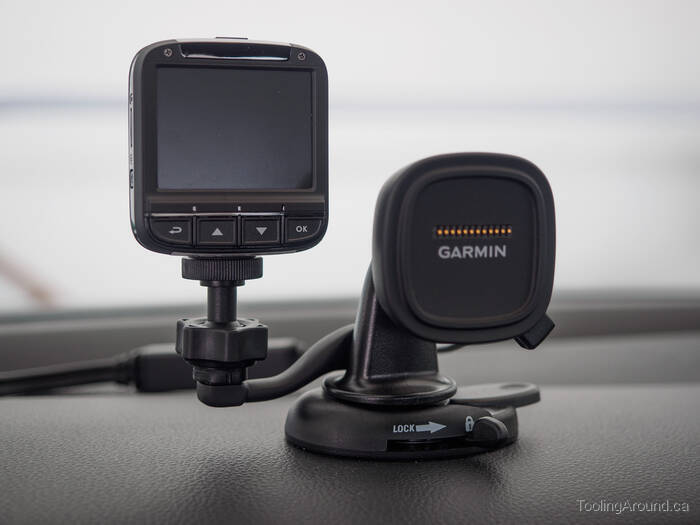
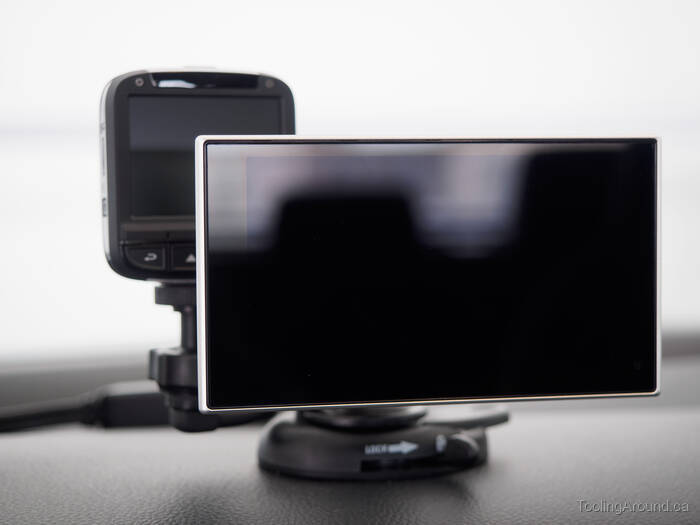
Here's how it looks, now that it's finished.
You can see how the camera sort of tucks in behind the GPS navigator.
This is how the completed bracket looks when it's in the car. It's not quite this neat, actually, once the USB power cord is installed.
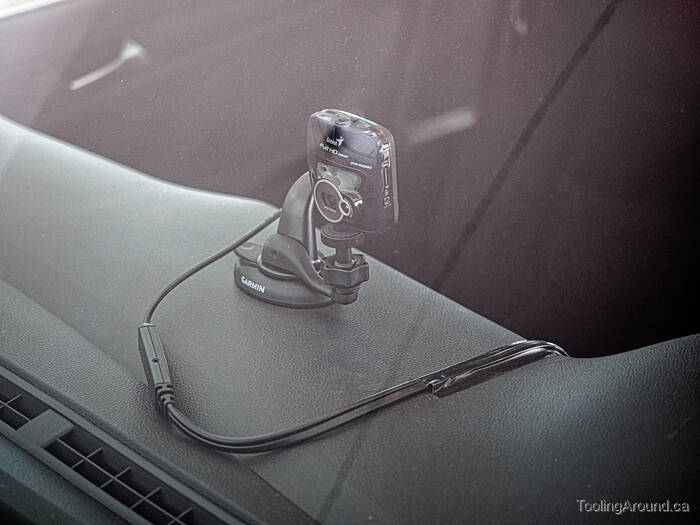
This photo is enhanced so you see more detail. It's normally shaded enough that, with the reflection on the windshield, the camera doesn't attract much attention. In any event, the Garmin mount is a quick-release device that makes removal easy.
When we're using the GPS navigator, it looks like this.
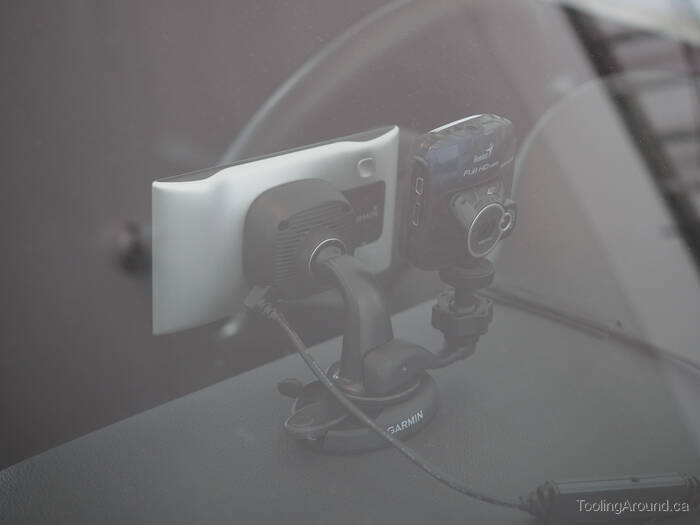
This is the view of the camera and GPS navigator from outside the vehicle. I used a polarizing filter for this photo, to reduce reflections. You can see the USB socket in the side of the camera. The cord is taped to the existing cord for the GPS navigator and adds little in the way of “visual bulk”.