 Tooling Around
Silver Brazing
If you're looking for authoritative information about silver brazing, this isn't it. This is just a page of photos and notes about how I do it. If you have suggestions for improving my technique, please pass them along.
By the way, silver brazing is also known as silver soldering or hard soldering. Considering the temperatures involved, it's more accurate to call it brazing, but maybe that's just being pedantic.
As the pictures show, things get really hot during brazing. Be sure to take appropriate precautions before you start and as you work. Safety is not retroactive.
Okay, before you go any further, I want you to be aware of a very useful video about silver brazing. Quinn Dunki (a.k.a. `Blondihacks') posted an excellent Silver Soldering For Beginners video that's available on YouTube here: Silver Soldering For Beginners.
Quinn has far more experience than me and I strongly suggest that you watch her video and defer to her advice, where it differs from mine. For example, you will note that she recommends pickling before brazing, as well as afterwards. This is excellent advice that is not mentioned on this page (yet).
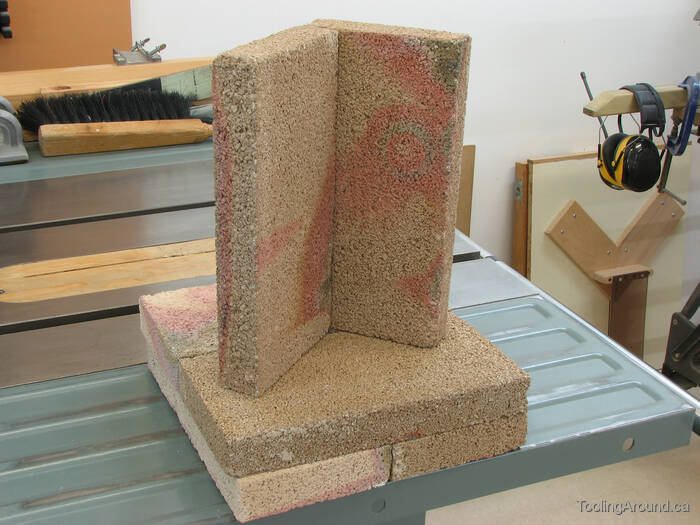
This is how I set up for brazing. I'm working on a steel extension wing for my table saw. On this, I place two pairs of fire bricks. Don't use ordinary bricks or concrete blocks – get the real thing from your local hardware store or building centre. Note that the pairs of bricks are at right angles to each other. This is so jets of hot gases will not flow down the space between the bricks to the surface, below. The bricks standing on edge form a corner to help contain the heat.
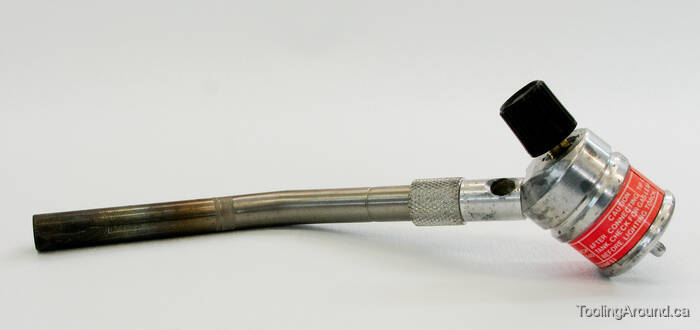
This is the propane torch that I use. It's a Spitfire Model VTK (300 Series) that I've had for years. I think they are no longer available, so maybe watch the garage sales, if you want one.
No doubt there are are better choices, but this is what I have and it works well. Sometimes, it is hard to get enough heat, when the work is larger and there's more mass to heat, but this torch does surprisingly well. For the amount of brazing I've done so far, I haven't seen the need to go to more sophisticated torches with the attendant increase in complexity and expense, especially as you get into other gases.
Speaking of gas, I use a 5 lb. propane tank and have for several years. When it finally runs out of propane, it will be too old to refill and new ones are more expensive than the common 20 lb. tanks used for barbecues, so I'll just borrow the one from our barbecue. I have a hose that's something over 1 m long, with appropriate fittings on the ends, to connect the torch to the tank. They're available where camping supplies are sold, as they're used to connect a camp stove to a larger tank, rather than using those little disposable ones.
By the way, although I have a basement shop, I never keep the propane tank in the house. During the winter, I keep it in our garage, close to the large exterior door. In the summer, it's in our garden shed. Remember that propane is one and one-half times heavier than air, so it will try to flow down to the basement, maybe near your furnace or water heater. Don't take any chances.
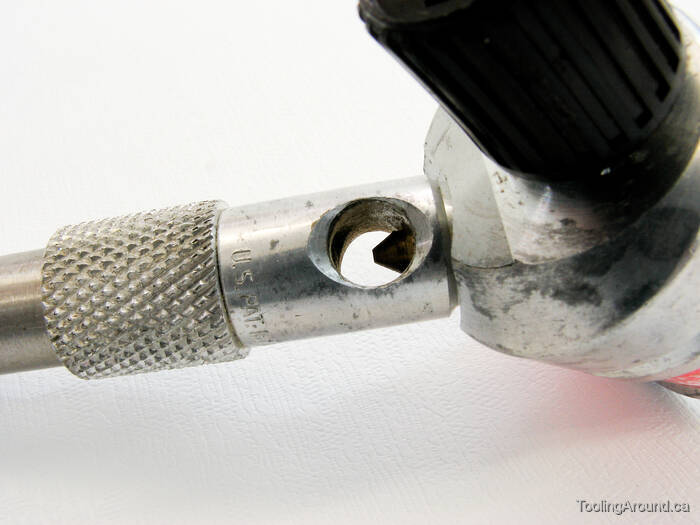
Here's why I like this torch. Propane is mixed with the oxygen in the air around us, producing the gas mixture that we burn. In most “handy-man” torches, this mixing happens very close to the tip, where the flame is. The Spitfire torch introduces air right here, just past the valve. What we can't see is the helical vanes inside the tube, that cause the gases to swirl around together and thoroughly mix before they come out the other end and burn. This produces a hotter flame.
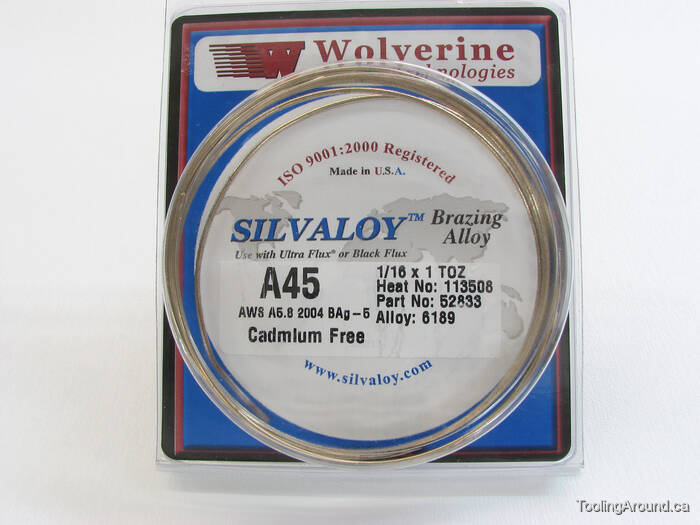
This is the brazing wire that I use. I bought it at a local welding supply shop. One of the important things about this one is that it is cadmium free. If you use one that contains cadmium, be very careful to provide lots of ventilation. You really don't want to breath the fumes from that stuff.
If you look at the labels on the packaging shown in the photo, you'll be mislead as to where to find more information. Wolverine Joining Technologies was acquired by Lucas Milhaupt. You can find information about suitable products at their web site: Lucas Milhaupt.
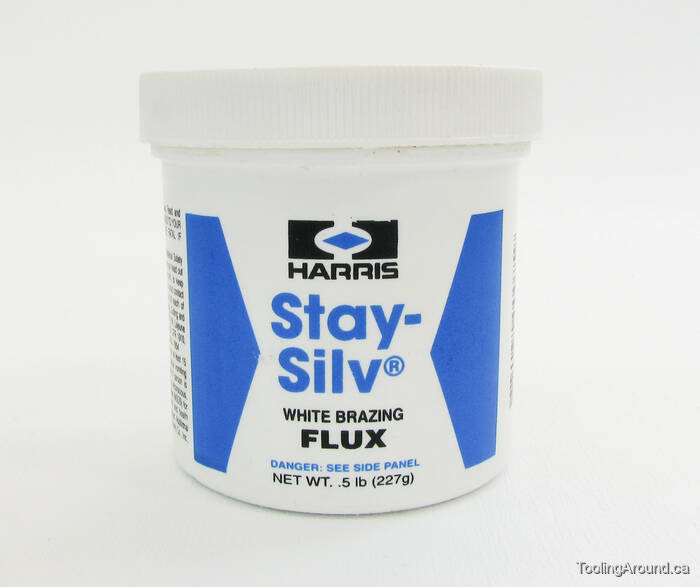
It would be hard to over-emphasize the need for cleanliness of the joint to be brazed. Good flux is essential to that cleanliness. (For silver brazing, the key ingredients are borax and water.) The flux I use is Stay-Silv, because that's what was offered at the welding supply shop that I visited. It's a good choice, as it turns liquid when heated and thoroughly penetrates the joint. Because I use it so seldom, it tends to dry out somewhat between uses. However, the lumps don't crystallize and I can just spray a few squirts of water from a spray bottle into the container and mix it in before use. You can read about this flux on the Harris Products site.
Not to harp on safety, but I will harp on safety: don't breathe the fumes. Keep your head away from them while brazing and provide sufficient ventilation. When you get flux on your skin, don't wait – rinse it off right away and wash thoroughly.
OK, there you have the essential three: torch, brazing alloy and flux. What's important is that they be matched in terms of working temperature. A mix of propane and air will burn at about 1,900° C. The brazing alloy melts at 665° C and flows at 745° C. The flux's active temperatures are from 566° C to 871° C. So, the brazing alloy and flux are well-matched and a propane torch will bring a workpiece to the correct temperature range, provided it's not too large a mass.
Here's a suggestion that's easily worth what you're paying for it: talk to the professionals. In this case, that was the person behind the counter at a welding supply shop. Sure, I had done my “research on the web”, whatever that means, but I needed to talk to someone who was in the business. First rule: being in the business means that he was making a living meeting the needs of other professionals. By simply recognizing this (and remembering that, for me, it's a hobby), I waited until the other customers had been served, even if someone came in after I did, explained that I needed his advice because I was new to this, and listened to what he had to say. My experience, in this case and other similar ones, is that I received excellent help and advice. A little courtesy goes a long way.
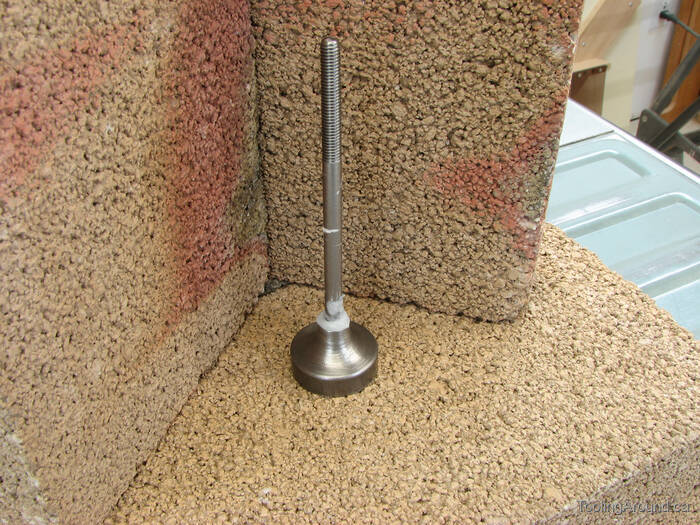
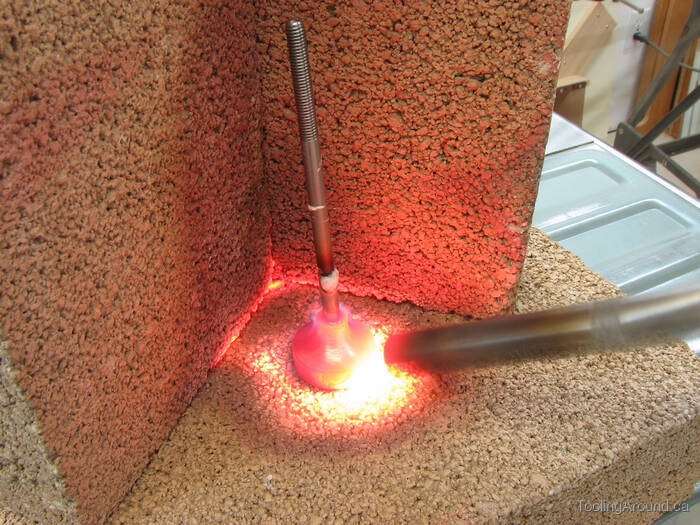
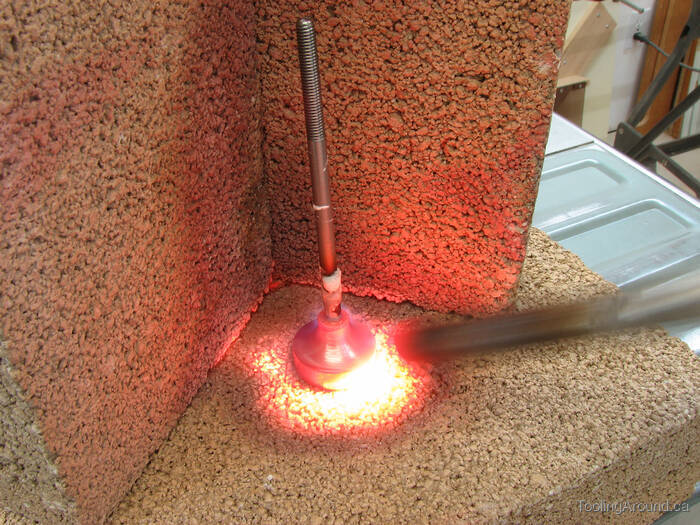
Alright, on with the brazing. A knob has been roughed out on the lathe and a shaft is going to be brazed into a hole in the end of the knob. The shaft is a close fit for the hole, by which I mean that it's easy to insert, but doesn't flop around at all.
First, I twirled the end of the shaft in the flux, giving it a thin coat. Then I inserted it into the hole, which resulted in some flux being squeezed up and out. I made sure that there was a reasonable amount of flux outside the joint, as shown here. When it's heated, flux will flow over the workpiece, cleaning it.
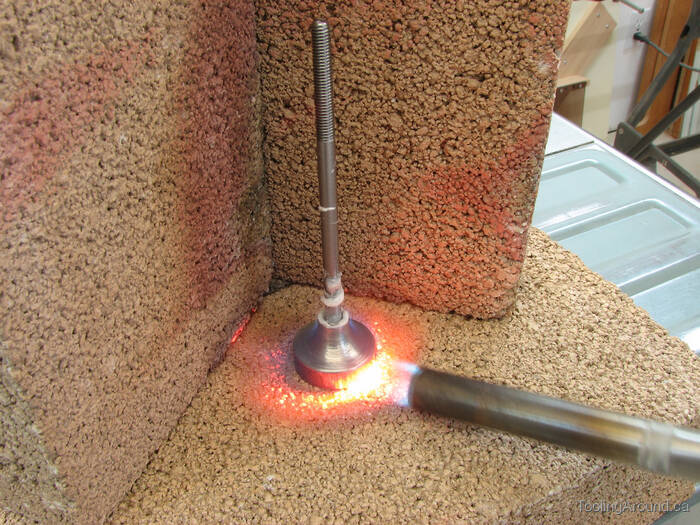
I applied heat to the thickest part of the knob. The idea is to heat the workpiece right through. When the workpiece is hot enough, it will melt the alloy.
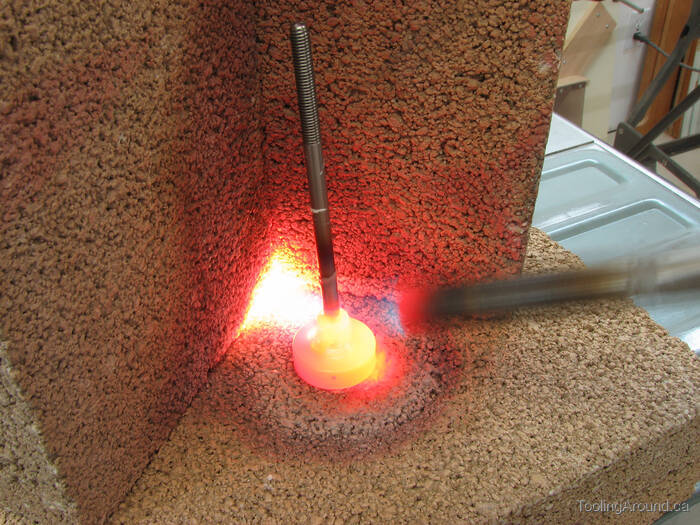
In this photo, you can see that the flux has started to melt.
Sometimes, when the joint is longer, I will cut off very short lengths of brazing wire (2-3mm long) and lay them along the joint, pushed into the flux. When the flux melts and disperses, the brazing material remains until the workpiece gets hot enough. Watching as the pieces of wire slump and then collapse, flowing into the joint, is a neat thing to see. In this case, the joint is very small and I chose to just touch the end of the wire to the joint after it was hot enough.
The workpiece is starting glow nicely. However, as the photo shows, the shaft has tilted to one side. I wondered why, but things were happening a little too quickly to think about it at the time.
As I was doing the brazing, my wife was making a series of exposures (many more than are shown here). The shutter speed was slow, which is why the end of the torch looks blurry, as I moved it from side to side to wrap the flame around the workpiece.
Later, I decided that what had probably happened is that the hole enlarged because the knob expanded due to the heat. It would have made sense to somehow secure the shaft in a vertical position, had I anticipated this happening.
A good way to secure parts for silver brazing is by using iron wire to fix them in position. Unable to find iron wire, I settled for steel wire with a black coating, that is sold inexpensively in small coils. It's soft steel, not springy, and works well for this purpose, although I expect iron wire would be even better. Anyway, the point is that the temperatures used in silver brazing will not melt the wire. It's also worth noting that it has little mass and will not soak up too much heat. A metal clamp, on the other hand, might make silver brazing a bit more challenging, when using a small torch.
The workpiece is nice and hot and I've touched the joint with the tip of the brazing wire. A bit of the brazing alloy has melted off and flowed into the joint.
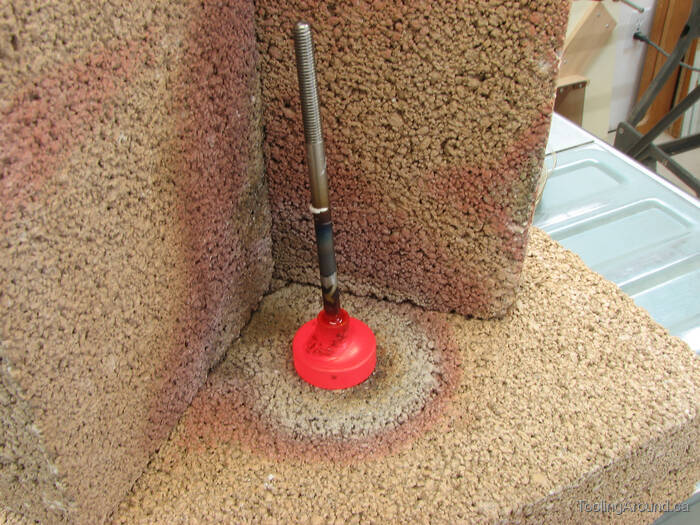
Isn't that a lovely colour? The workpiece has cooled considerably.
It seems a little odd to describe a red-hot object as having cooled.
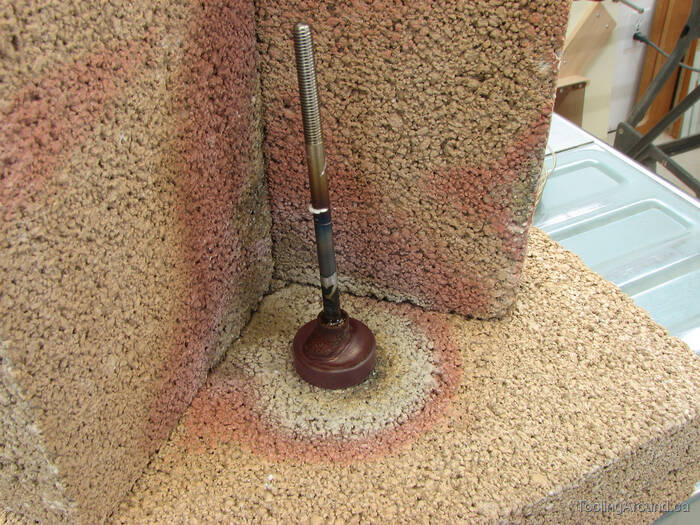
You wouldn't want to touch it, but it's almost cool. By now I had realized what was wrong with the tilting shaft and reheated the workpiece. Touching the tip of a screwdriver to the tip of the shaft, I moved it plumb and let it cool, again.

As you can see, it looks pretty good. I was happy that the knob was just “rough turned”, as I figured I had enough leeway to chuck the shaft in the lathe and turn the knob true. However, I was pleased to discover that it ran true in the lathe, so it worked out fine.
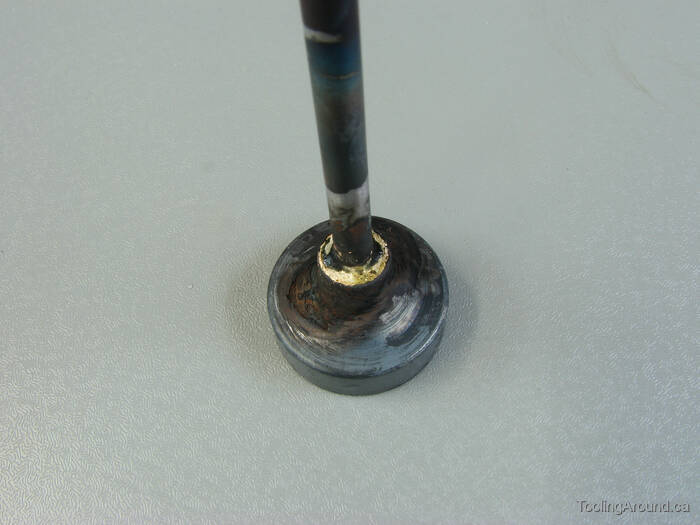
The joint looks good, what you can see of it. The metal has discoloured from the heat and there are hard deposits of baked-on flux and carbon. What to do?
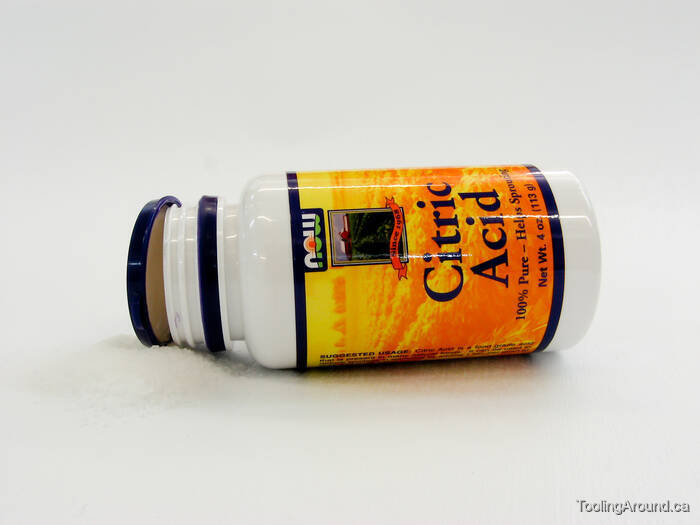
The solution is, well, a solution of citric acid, making a pickling solution that can remove these deposits.
I bought this container of crystals at a health food store. It's “useful in sprouting, canning, drying or freezing.” Now you know.
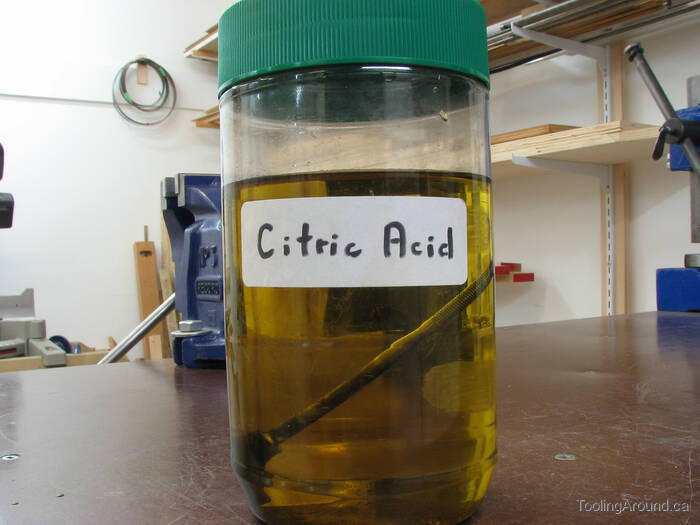
I mixed a much stronger solution than was described on the container and put the workpiece in for a nice soak.
Need I remind you that this is acid? Didn't think so, but do be very careful. As always, if you get any on your skin, rinse it off thoroughly.
Here's how it looked after soaking for a few hours. I've been using that solution for a while, so it isn't as strong as it once was. For more complete cleaning, it should probably soak overnight. However, this particular article is just roughed out, so what little remains will disappear as the part is finished.
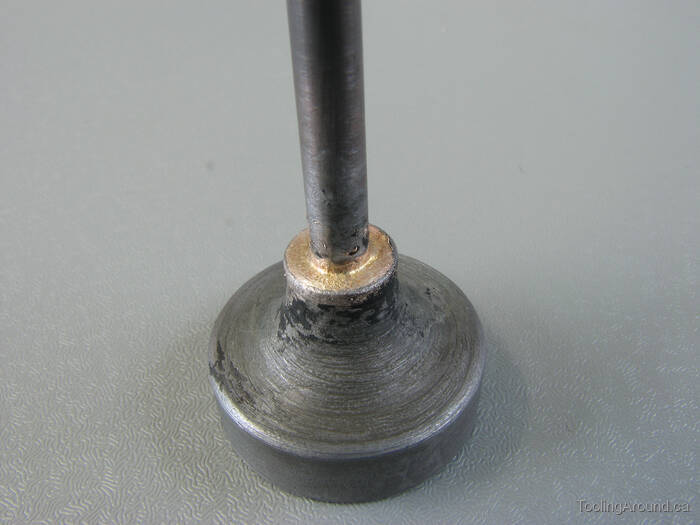
Now that it's clean, you can see that I used just a bit too much brazing material. Not harm was done, but it's better to use just the right amount. Maybe someday I'll get the hang of it.