 Tooling Around
Adjusting A Steady Rest

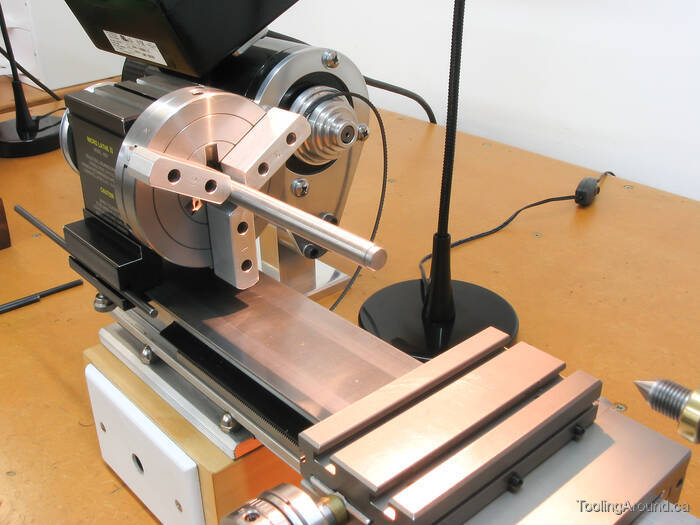
Here's the Taig steady rest, showing the three brass arms that support a workpiece, keeping it, well, steady. The cap screws hold the arms in position, as shown in the following photo. Finally, the rest is clamped to the lathe bed by tightening the clamp on the bottom.

A steady rest is used to support the end of a workpiece that projects a significant distance from the chuck or collet. What distance is significant? If you think the end might shift out of alignment under the pressure of cutting forces, it's probably significant. If you try to cut it and it does shift, it's definitely significant.
Of course, it helps if the end of the workpiece is not just supported, but supported in the correct position, relative to the spindle's axis of rotation. My approach to finding this position is very simple and is based on the observation that the end close to the chuck or collet can be taken to be on axis.
Here's a workpiece that will be prone to whipping about at the end that's hanging out in the air. OK, maybe that's exaggerating, but at the very least a cutting tool will cause it to deflect.
Clamp the steady rest to the lathe bed, close to the chuck. Loosen each brass arm in turn, pushing on the end to make close contact with the workpiece and then retightening the cap screws to hold the arm in position.

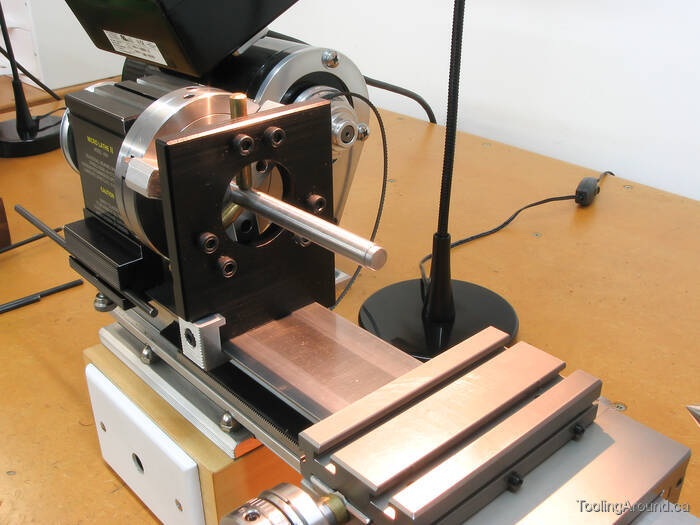
Loosen just the top brass arm. OK, maybe you didn't have to tighten that one in the first place. Loosen the steady clamp and move the clamp out near the end, where you really want it.
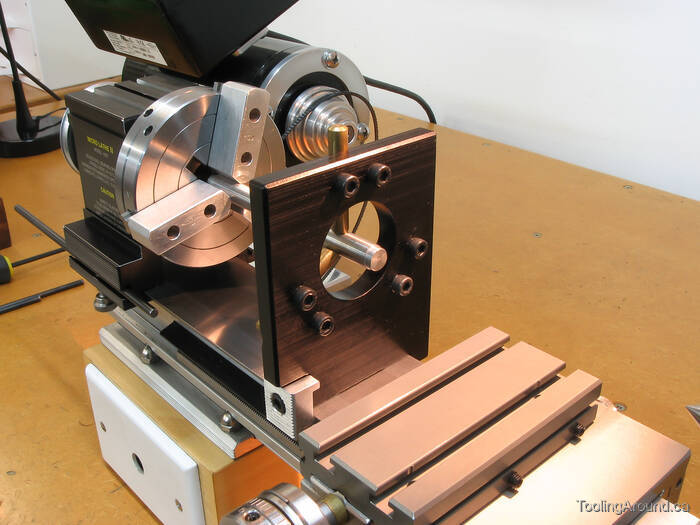
Loosen the cap screws holding the top brass arm, allowing it to slide down against the workpiece. Press down on the workpiece to make sure it is in good contact with the bottom two arms, the ones that you didn't loosen. Occasionally, it is possible that you will have to loosen the chuck a tiny bit to allow the workpiece to move, but that would indicate a different problem. Keeping pressure on the workpiece, also apply fingertip pressure to the top brass arm and tighten its cap screws.
The adjustment's pretty simple to do, as indeed it should be. It's almost too obvious to bother mentioning, but I discovered that some things weren't so obvious when I was just getting started.