 Tooling Around
Drawers
It's remarkable how a collection of small bits of hardware, fasteners and this-bit-of-scrap-could-be-useful pieces of metal one collects after a bit of time in the shop. Rather than dump roughly similar items into boxes or cans, I decided to make a set of drawers. In doing so, I decided that I wanted to minimize cost and complexity. This led to a simple design requiring no hardware, using just 3 mm tempered hardboard, 12 mm, 9-ply birch plywood and some scraps of particle board.
Router Guide (Skip to "Drawers".)
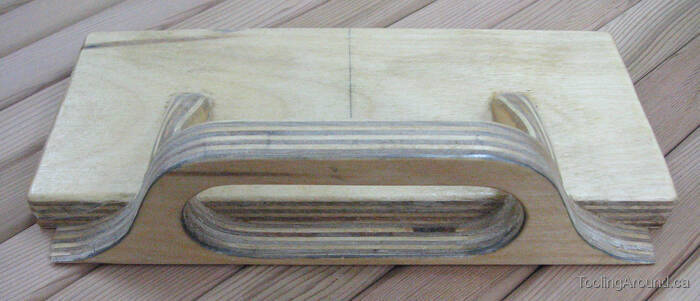
Having decided to make integrated drawer pulls, rather than attaching separate hardware, the first step was to come up with an appropriate shape. I decided to make them large enough to let me slide all of my fingers into the handle, so a slot with rounded ends seemed appropriate. I reasoned that one side of this slot could be, say, 3 mm from the front of a drawer. If the material was a built-up sandwich of three thicknesses of the tempered hardboard used for a drawer bottom, a drawer pull would be 9 mm thick. It followed that cutting it to a square cross-section and fairing the ends into the drawer front would result in a pleasing and functional shape. They certainly wouldn't loosen over time.
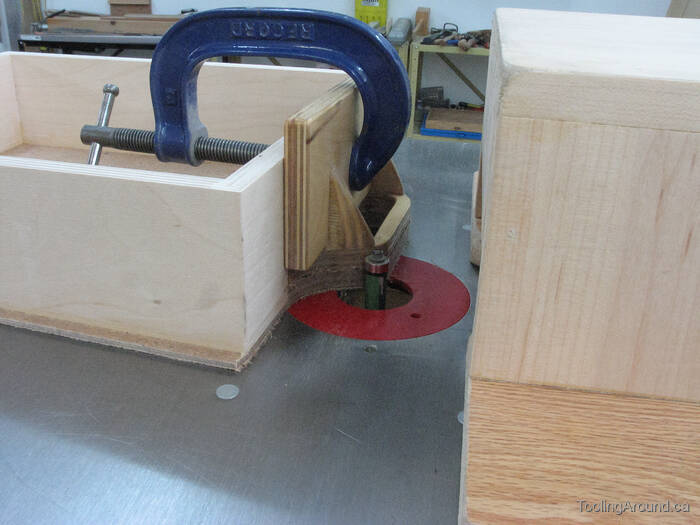
This photo shows the bottom of a simple plywood jig, used as guide when shaping the handle. On the bottom, you can clearly see the shape of the drawer pull.
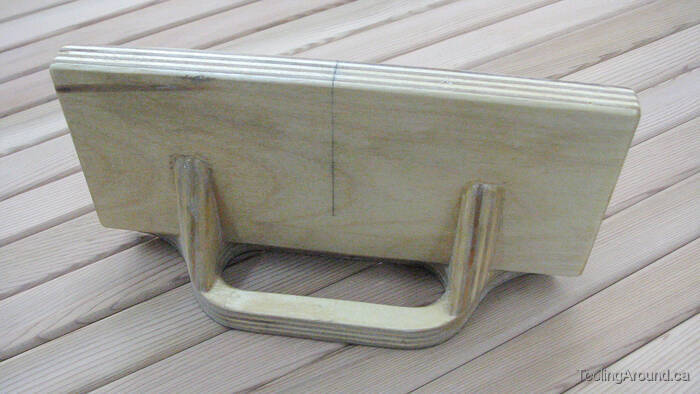
To use the jig, clamp it to the drawer front and use a table-mounted router with a top bearing.
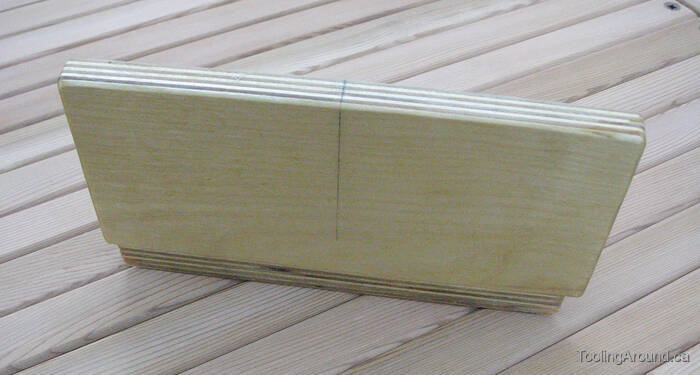
A centre line on each side and wrapping over the top helps get the pull in the correct location.
Drawers (Skip to "Cabinet".)
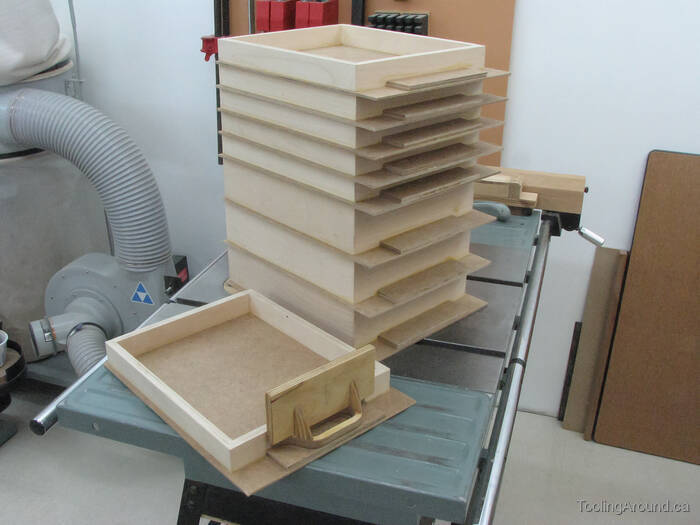
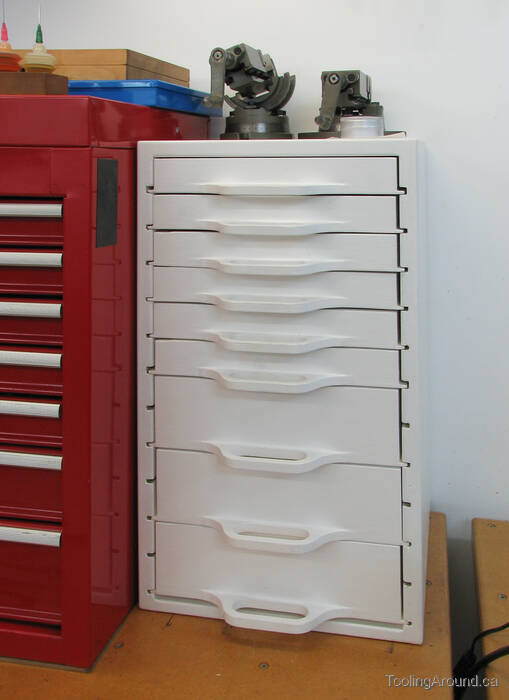
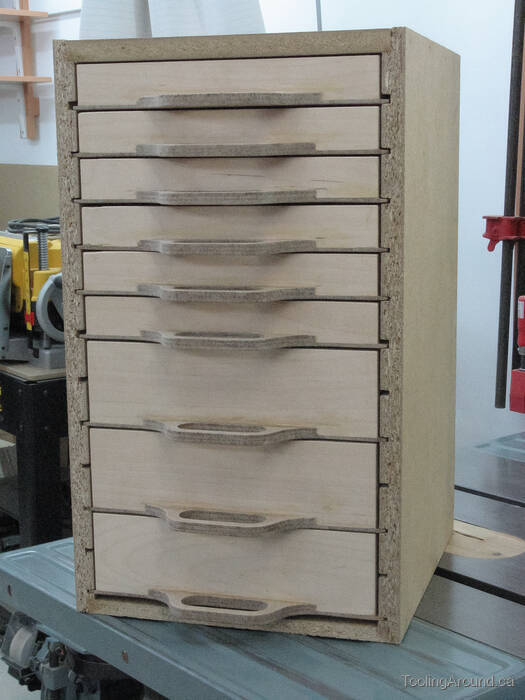
Here's the stack of drawers. Each consists of a perimeter frame made of strips of 12 mm plywood and a drawer bottom made of 3 mm tempered hardboard.
The outside dimensions of the frames are 264 mm × 324 mm. (I was probably aiming for 1 mm more!) The heights are 35 mm and 75 mm. Each drawer bottom projects 8 mm beyond each side of its drawer.
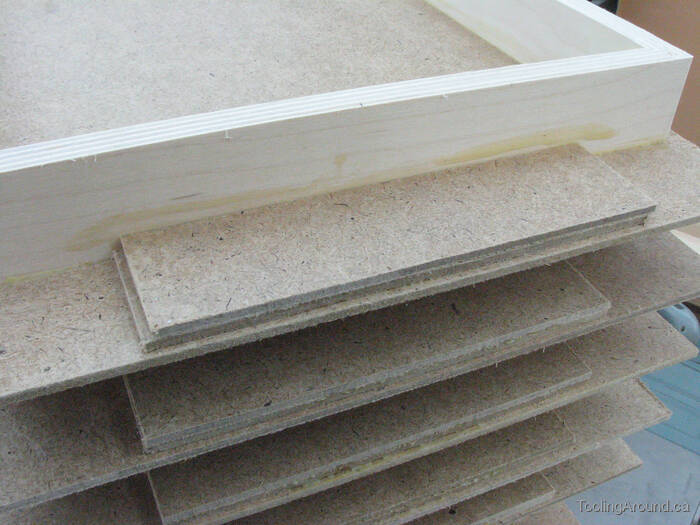
This photo shows how the drawer bottom projects far enough to form a drawer pull. Two short strips of hardboard are glued on top to make the sandwich that will be used for the pull.
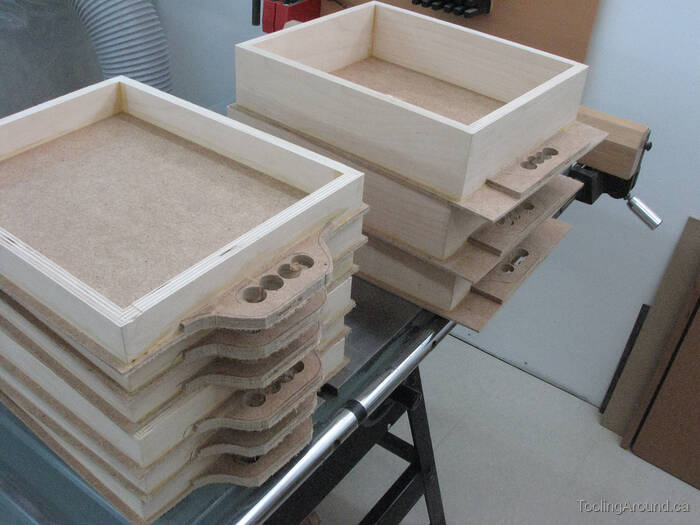
If you look closely, you can see pencil marks where I used the handle jig to trace the shape of the drawer pulls. I drilled holes to reduce the amount of material to be removed by routing. Similarly, I used a bandsaw to trim close to the line of the outside of each drawer pull. The stack on the left have been trimmed and those on the right are ready to trim.
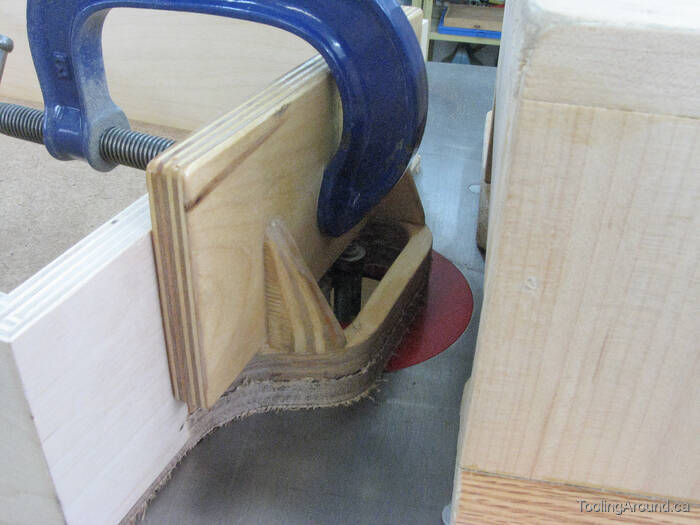
After dropping one of the holes over the router bit, it was run around the inside of the pull.
The outside of the pull was finished, although there was a slight bump where the bit passed off the end of the guide and onto the drawer front. This was later faired smooth, using a file.
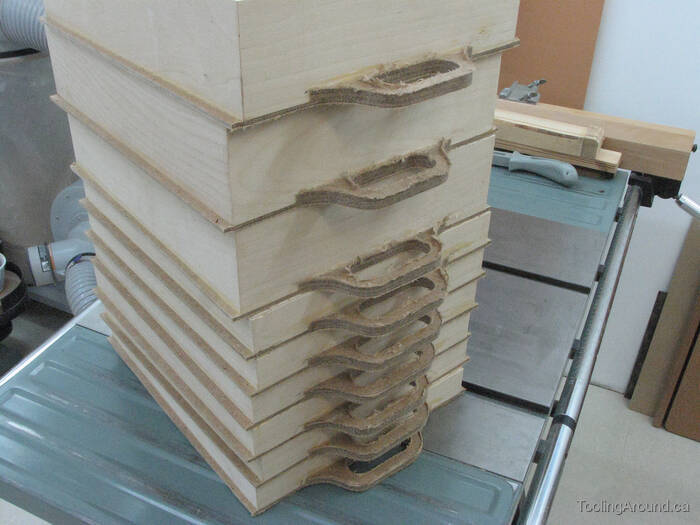
Here's the stack of drawers, after routing the drawer pulls.
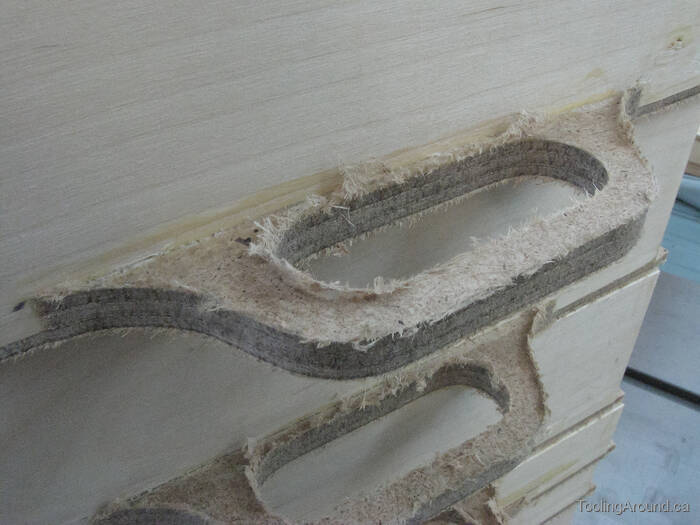
It seems to be the nature of hardboard that the edges will be furry after routing.
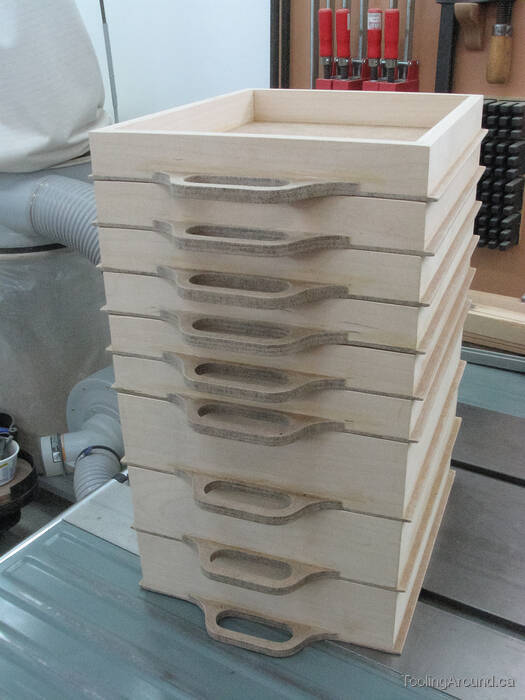
After some sanding, they were ready to paint.
Cabinet

The next step was to make the cabinet. I just used some particle board from my collection of off cuts. The main thing is to make sure that the sides are thick enough to allow you to cut slots to hold the drawer bottoms where they project past the drawer. A solid back helps keep the dust out and provides the required rigidity.
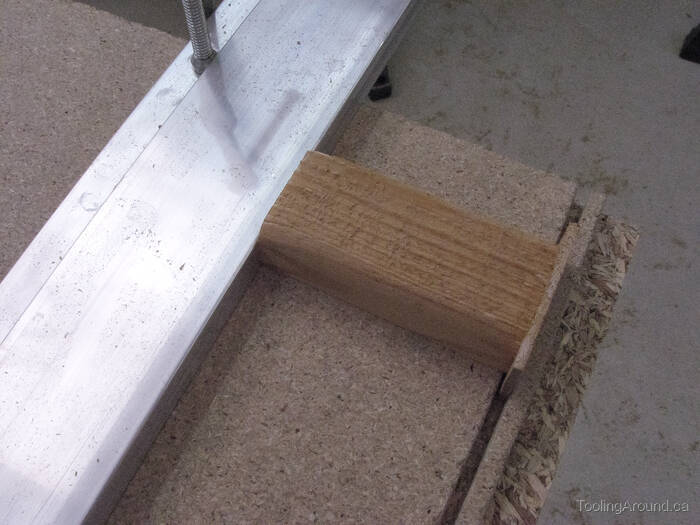
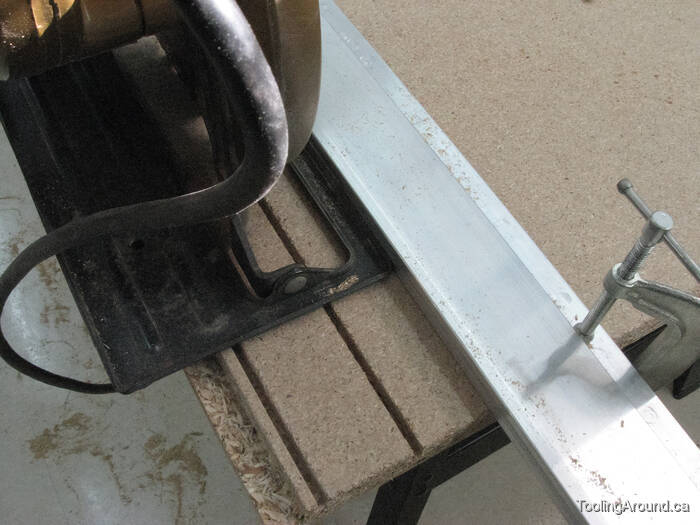
The little gadget in the photo is a jig that I used to set the circular saw guide at the correct distance from slot to slot. It's just a scrap of wood and a bit of 3 mm tempered hardboard, the same material as the drawer bottoms.
Having cut the first slot, this is how I used the jig to position the straight edge to cut the next, and so on. The slots were cut in a single piece of particle board, following which it was cut in two to make the two sides. This meant that a single setup served to cut the slots on both sides of the cabinet, making the process more efficient and less error prone.
The slots were cut at 40 mm intervals: 35 mm drawer height + 3 mm drawer bottom thickness + 2 mm clearance. In the case of the deeper drawers, it works out to an 80 mm interval: 75 mm drawer height + 3 mm drawer bottom thickness + 2 mm clearance. However, a 40 mm interval was used for the entire cabinet, resulting in the ability to intersperse deeper and shallower drawers in any desired order.
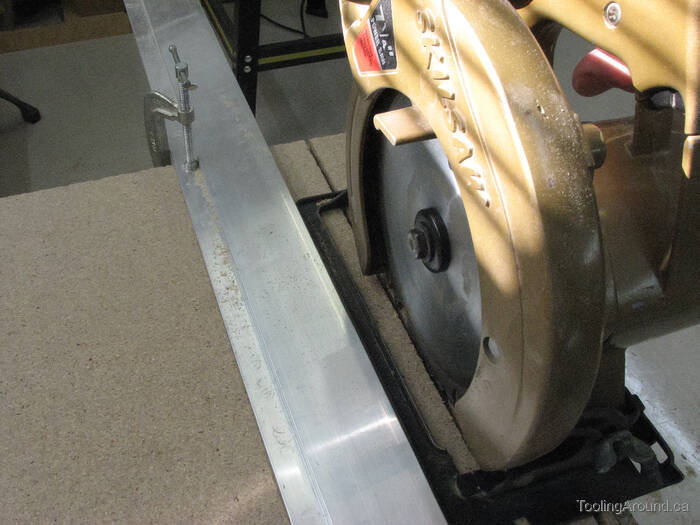
Yes, that's a genuine, old-style Skilsaw. Now you know how old some of my shop equipment really is.
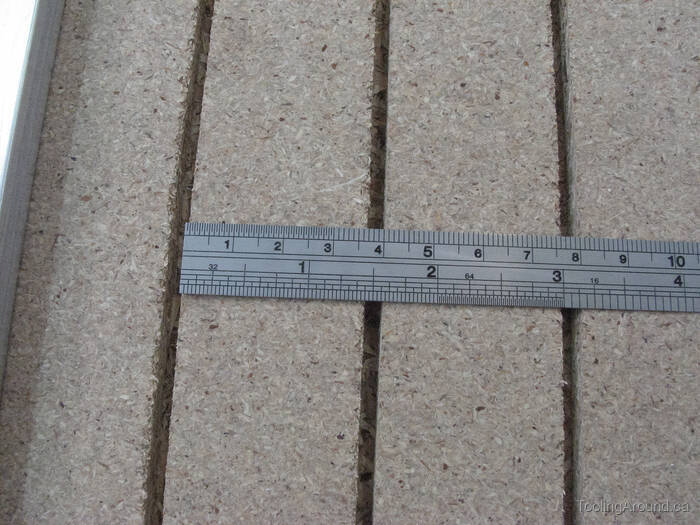
The saw guide and jig did their job, getting the spacing right on 40 mm.
Here's the test fitting of the drawers in the cabinet. As you can see, I somehow managed to mis-cut two of the slots, both of which are too wide. At least my technique guaranteed that the error would show up on both sides!
Now, all that remained to do was to apply some wood filler to smooth the edges of the case.
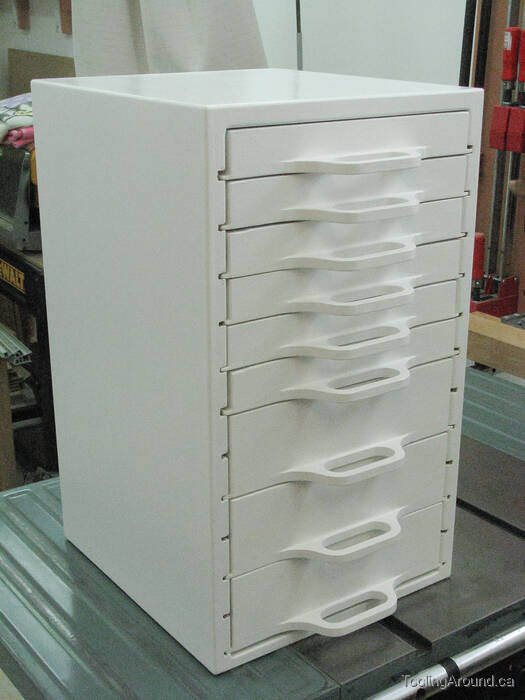
After two coats of paint and a little wax on the runner area, they work fine.
As you can see, I painted the “runners” that are actually the outer edges of the drawer bottoms, sticking out the sides a bit. This is not cosmetic: it's to make that part of the material harder, as it's a bearing surface.
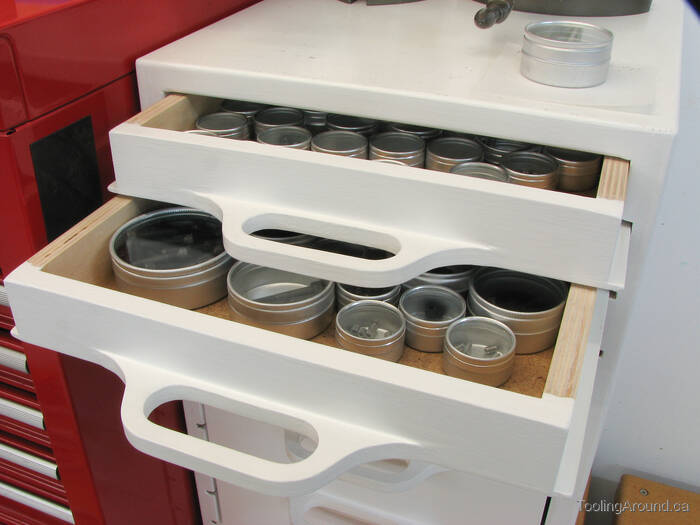
In the top three drawers, I have some sixty-seven of those little glass-topped “watchmaker's cases”. They're inexpensive and just the thing for this application. The ones I have came from Lee Valley Tools.